
App Intents
Adding intents to your app has always been simple, but the editor has historically been a bit of a pain. When you get advanced and start localising things, or using custom enums, it gets clunky really quickly. The new App Intents framework looks to change all this, and we can get started with it right away.
The basics
No more intent editor.
We have a new SwiftUI like 100% code approach to building our intents. It's all built around some simple new protocols, with a lot less domain knowledge required to get up to speed.
Today, we'll look at building an intent that will open our app and deep link to some content.
Lets get started with our view coffee intent. We'll call it ViewCoffeeIntent and make it conform to AppIntent
import AppIntents

struct ViewCoffeeIntent: AppIntent {
}
import AppIntents
struct ViewCoffeeIntent: AppIntent {
}We have to add a minimal amount of metadata in order to make sure our intent looks good.
struct ViewCoffeeIntent: AppIntent {
    static var title: LocalizedStringResource = "View a coffee"
    static var description = IntentDescription("Jumps you right into the app, and into your favourite coffee.")
}
struct ViewCoffeeIntent: AppIntent {
static var title: LocalizedStringResource = "View a coffee"
static var description = IntentDescription("Jumps you right into the app, and into your favourite coffee.")
}We also want our intent to open the app when interacted with, so lets set that to true ( it defaults to false, so watch out for this. )
struct ViewCoffeeIntent: AppIntent {
    static var title: LocalizedStringResource = "View a coffee"
    static var description = IntentDescription("Jumps you right into the app, and into your favourite coffee.")
    static var openAppWhenRun: Bool = true
}
struct ViewCoffeeIntent: AppIntent {
static var title: LocalizedStringResource = "View a coffee"
static var description = IntentDescription("Jumps you right into the app, and into your favourite coffee.")
static var openAppWhenRun: Bool = true
}Next, lets add a parameter of the coffee the user wants to view.
struct ViewCoffeeIntent: AppIntent {
    static var title: LocalizedStringResource = "View a coffee"
    static var description = IntentDescription("Jumps you right into the app, and into your favourite coffee.")

    @Parameter(title: "coffee")
    var coffee: Coffee?
}
struct ViewCoffeeIntent: AppIntent {
static var title: LocalizedStringResource = "View a coffee"
static var description = IntentDescription("Jumps you right into the app, and into your favourite coffee.")
@Parameter(title: "coffee")
var coffee: Coffee?
}Coffee isn't a Siri custom type, its actually just a normal Swift model with some protocol conformances! To make a model capable of being used like this in an intent, you just need to conform to AppEntity.
Here's the minimal implementation of Coffee, which shows you a simple example of an EntityStringQuery. We provide this query so that Siri knows how to resolve our entities, so we might get passed "flat" when someone wanted a flat white, so we can return the one we think they mean.
struct Coffee: Equatable, Hashable, AppEntity {
    typealias DefaultQueryType = CoffeeQuery
    static var defaultQuery: CoffeeQuery = CoffeeQuery()

    static var typeDisplayName: LocalizedStringResource = LocalizedStringResource("Coffee", defaultValue: "Coffee")
    var displayRepresentation: DisplayRepresentation {
        DisplayRepresentation(title: .init(stringLiteral: name))
    }

    let id: UUID
    let name: String
    let imageUrl: URL
}

struct CoffeeQuery: EntityStringQuery {
    typealias Entity = Coffee
    func entities(matching string: String) async throws -> [Coffee] {
        return Coffee.all.filter({ $0.name.starts(with: string) })
    }

    func entities(for identifiers: [UUID]) async throws -> [Coffee] {
        return Coffee.all.filter({ identifiers.contains($0.id) })
    }
}
struct Coffee: Equatable, Hashable, AppEntity {
typealias DefaultQueryType = CoffeeQuery
static var defaultQuery: CoffeeQuery = CoffeeQuery()
static var typeDisplayName: LocalizedStringResource = LocalizedStringResource("Coffee", defaultValue: "Coffee")
var displayRepresentation: DisplayRepresentation {
DisplayRepresentation(title: .init(stringLiteral: name))
}
let id: UUID
let name: String
let imageUrl: URL
}
struct CoffeeQuery: EntityStringQuery {
typealias Entity = Coffee
func entities(matching string: String) async throws -> [Coffee] {
return Coffee.all.filter({ $0.name.starts(with: string) })
}
func entities(for identifiers: [UUID]) async throws -> [Coffee] {
return Coffee.all.filter({ identifiers.contains($0.id) })
}
}Back to our intent, lets get it finished.
We want to make sure that there's always a coffee provided, so lets make it non optional using a DynamicOptionsProvider. This will give us the fallback of options that the intents system can go to, meaning we'll always get a value.
A DynamicOptionsProvider is really easy to setup, and can actually perform async work.
private struct CoffeeOptionsProvider: DynamicOptionsProvider {
    func results() async throws -> [Coffee] {
        Coffee.all
    }
}
private struct CoffeeOptionsProvider: DynamicOptionsProvider {
func results() async throws -> [Coffee] {
Coffee.all
}
}To connect this up, we can just add it to the parameter.
@Parameter(title: "Coffee", optionsProvider: CoffeeOptionsProvider())@Parameter(title: "Coffee", optionsProvider: CoffeeOptionsProvider())Our final piece of work is the perform function, which lets us actually perform a task as a result of this intent. Here, we're just going to pass a "requested coffee" to a shared ObservableObject that we can handle later.
We need to return the result of our intent, or IntentResult, where we can specify a dialogue or view to show as a result. We're just going to go for a dialogue here.
struct ViewCoffeeIntent: AppIntent {
    static var title: LocalizedStringResource = "View a coffee"
    static var description = IntentDescription("Jumps you right into the app, and into your favourite coffee.")
    static var openAppWhenRun: Bool = true

    @Parameter(title: "Coffee", optionsProvider: CoffeeOptionsProvider())
    var coffee: Coffee

    func perform() async throws -> some IntentPerformResult {
        NavigationManager.shared.open(coffee: coffee)
        return .finished(dialog: .init("Fetching your brew."))
    }
}
struct ViewCoffeeIntent: AppIntent {
static var title: LocalizedStringResource = "View a coffee"
static var description = IntentDescription("Jumps you right into the app, and into your favourite coffee.")
static var openAppWhenRun: Bool = true
@Parameter(title: "Coffee", optionsProvider: CoffeeOptionsProvider())
var coffee: Coffee
func perform() async throws -> some IntentPerformResult {
NavigationManager.shared.open(coffee: coffee)
return .finished(dialog: .init("Fetching your brew."))
}
}The NavigationManager is nothing fancy, it just pushlishes a requested coffee if there is one.
class NavigationManager: ObservableObject {
    static let shared = NavigationManager()

    @Published var requestedCoffee: Coffee?

    func open(coffee: Coffee) {
        DispatchQueue.main.async {
            self.requestedCoffee = coffee
        }
    }
}
class NavigationManager: ObservableObject {
static let shared = NavigationManager()
@Published var requestedCoffee: Coffee?
func open(coffee: Coffee) {
DispatchQueue.main.async {
self.requestedCoffee = coffee
}
}
}Here's my content view too, where I consume the NavigationManager.
All this code is in the sample linked at the end, so don't worry about it too much!
struct ContentView: View {
    @ObservedObject var navigationManager = NavigationManager.shared
    @State var navigationStack: [Coffee] = []

    var body: some View {
        NavigationStack(path: $navigationStack) {
            MenuView()
                .navigationDestination(for: Coffee.self) { coffee in
                    CoffeeDetailView(coffee: coffee)
                }
        }
        .onChange(of: navigationManager.requestedCoffee) { newValue in
            if let coffee = newValue {
                navigationStack = [coffee]
                navigationManager.requestedCoffee = nil
            }
        }
    }
}
struct ContentView: View {
@ObservedObject var navigationManager = NavigationManager.shared
@State var navigationStack: [Coffee] = []
var body: some View {
NavigationStack(path: $navigationStack) {
MenuView()
.navigationDestination(for: Coffee.self) { coffee in
CoffeeDetailView(coffee: coffee)
}
}
.onChange(of: navigationManager.requestedCoffee) { newValue in
if let coffee = newValue {
navigationStack = [coffee]
navigationManager.requestedCoffee = nil
}
}
}
}To make sure that we expose this intent to the shortcuts app, which will really help with testing, we'll need to use an AppShortcutsProvider.
This lets us provide an example phrase, alongside telling the system about our shortcut itself.
struct CoffeeShortcuts: AppShortcutsProvider {
    static var appShortcuts: [AppShortcut] {
        AppShortcut(
            intent: ViewCoffeeIntent(coffee: .init(title: "Coffee")),
            phrases: ["Show me my favourite coffee"]
        )
    }
}
struct CoffeeShortcuts: AppShortcutsProvider {
static var appShortcuts: [AppShortcut] {
AppShortcut(
intent: ViewCoffeeIntent(coffee: .init(title: "Coffee")),
phrases: ["Show me my favourite coffee"]
)
}
}As our intent has parameters, we need to tell the system about it. We'll need to to do this every time our entities change, but for now we're just going to do it when our ContentView appears.
.onAppear {
    CoffeeShortcuts.updateAppShortcutParameters()
}.onAppear {
CoffeeShortcuts.updateAppShortcutParameters()
}Now, lets open our shortcuts app to see our shortcut.
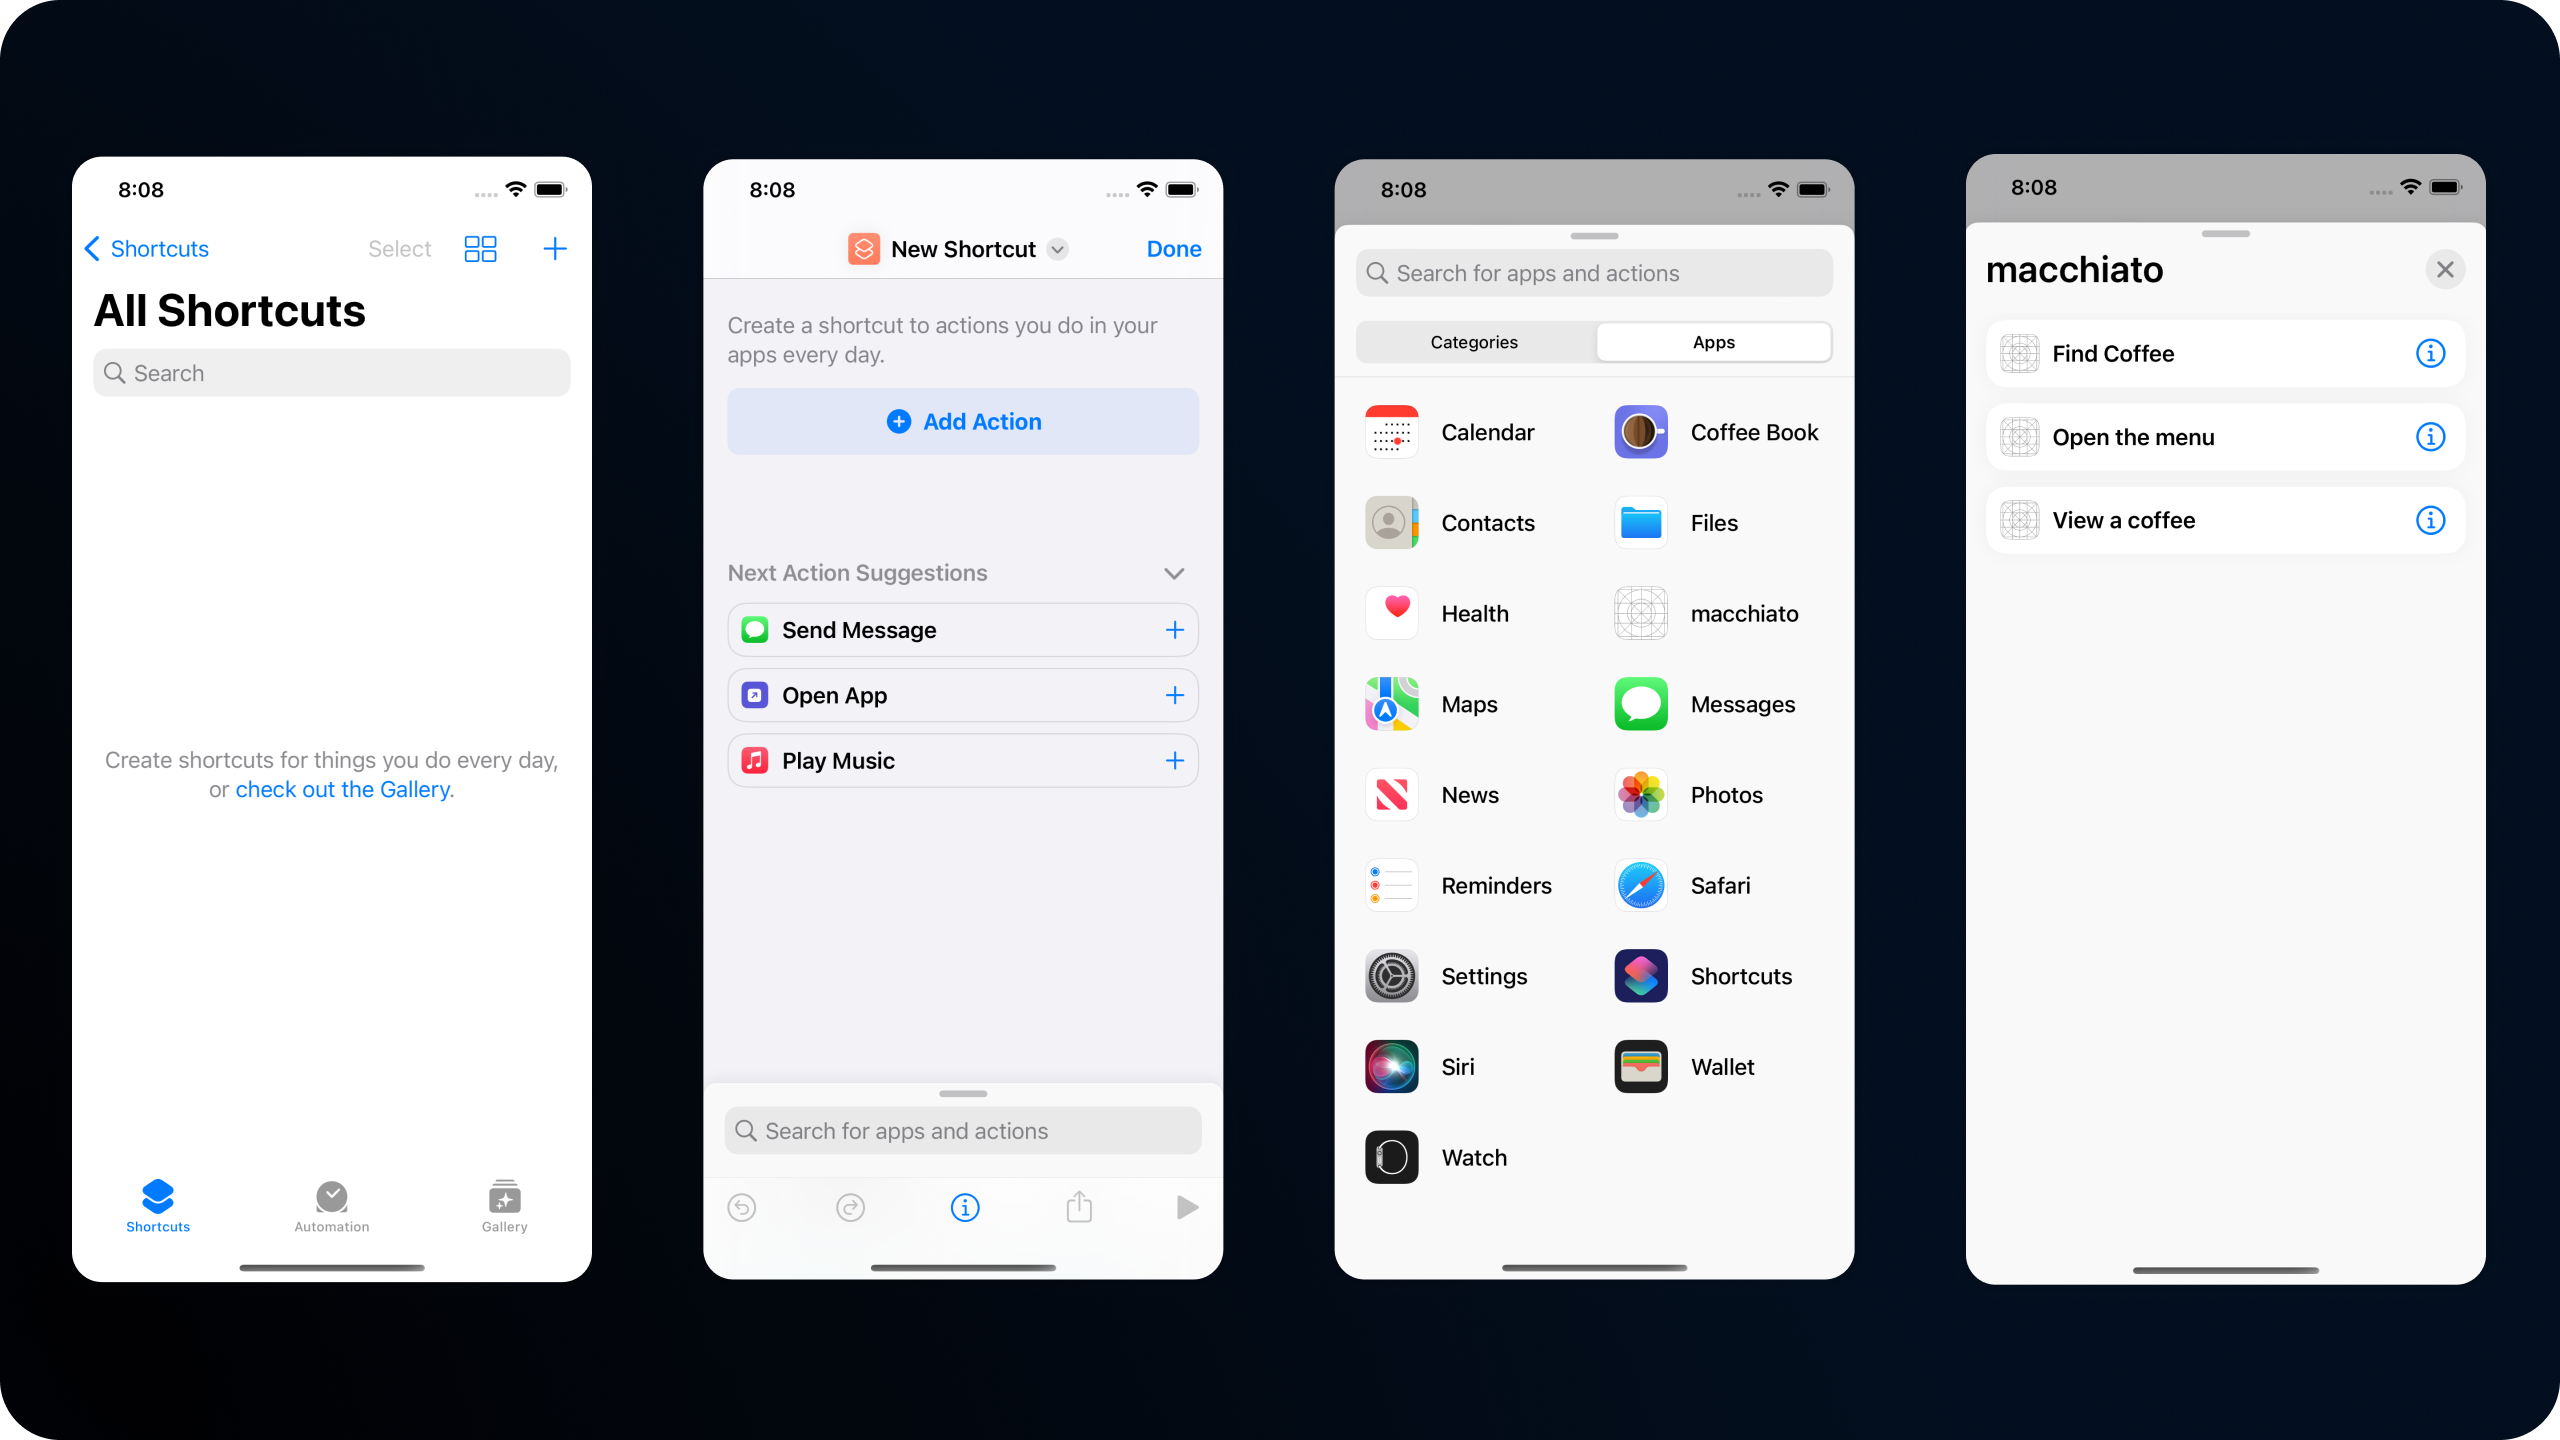
When we customise it and run it, it opens our app, and shows the Coffee for us - how neat!
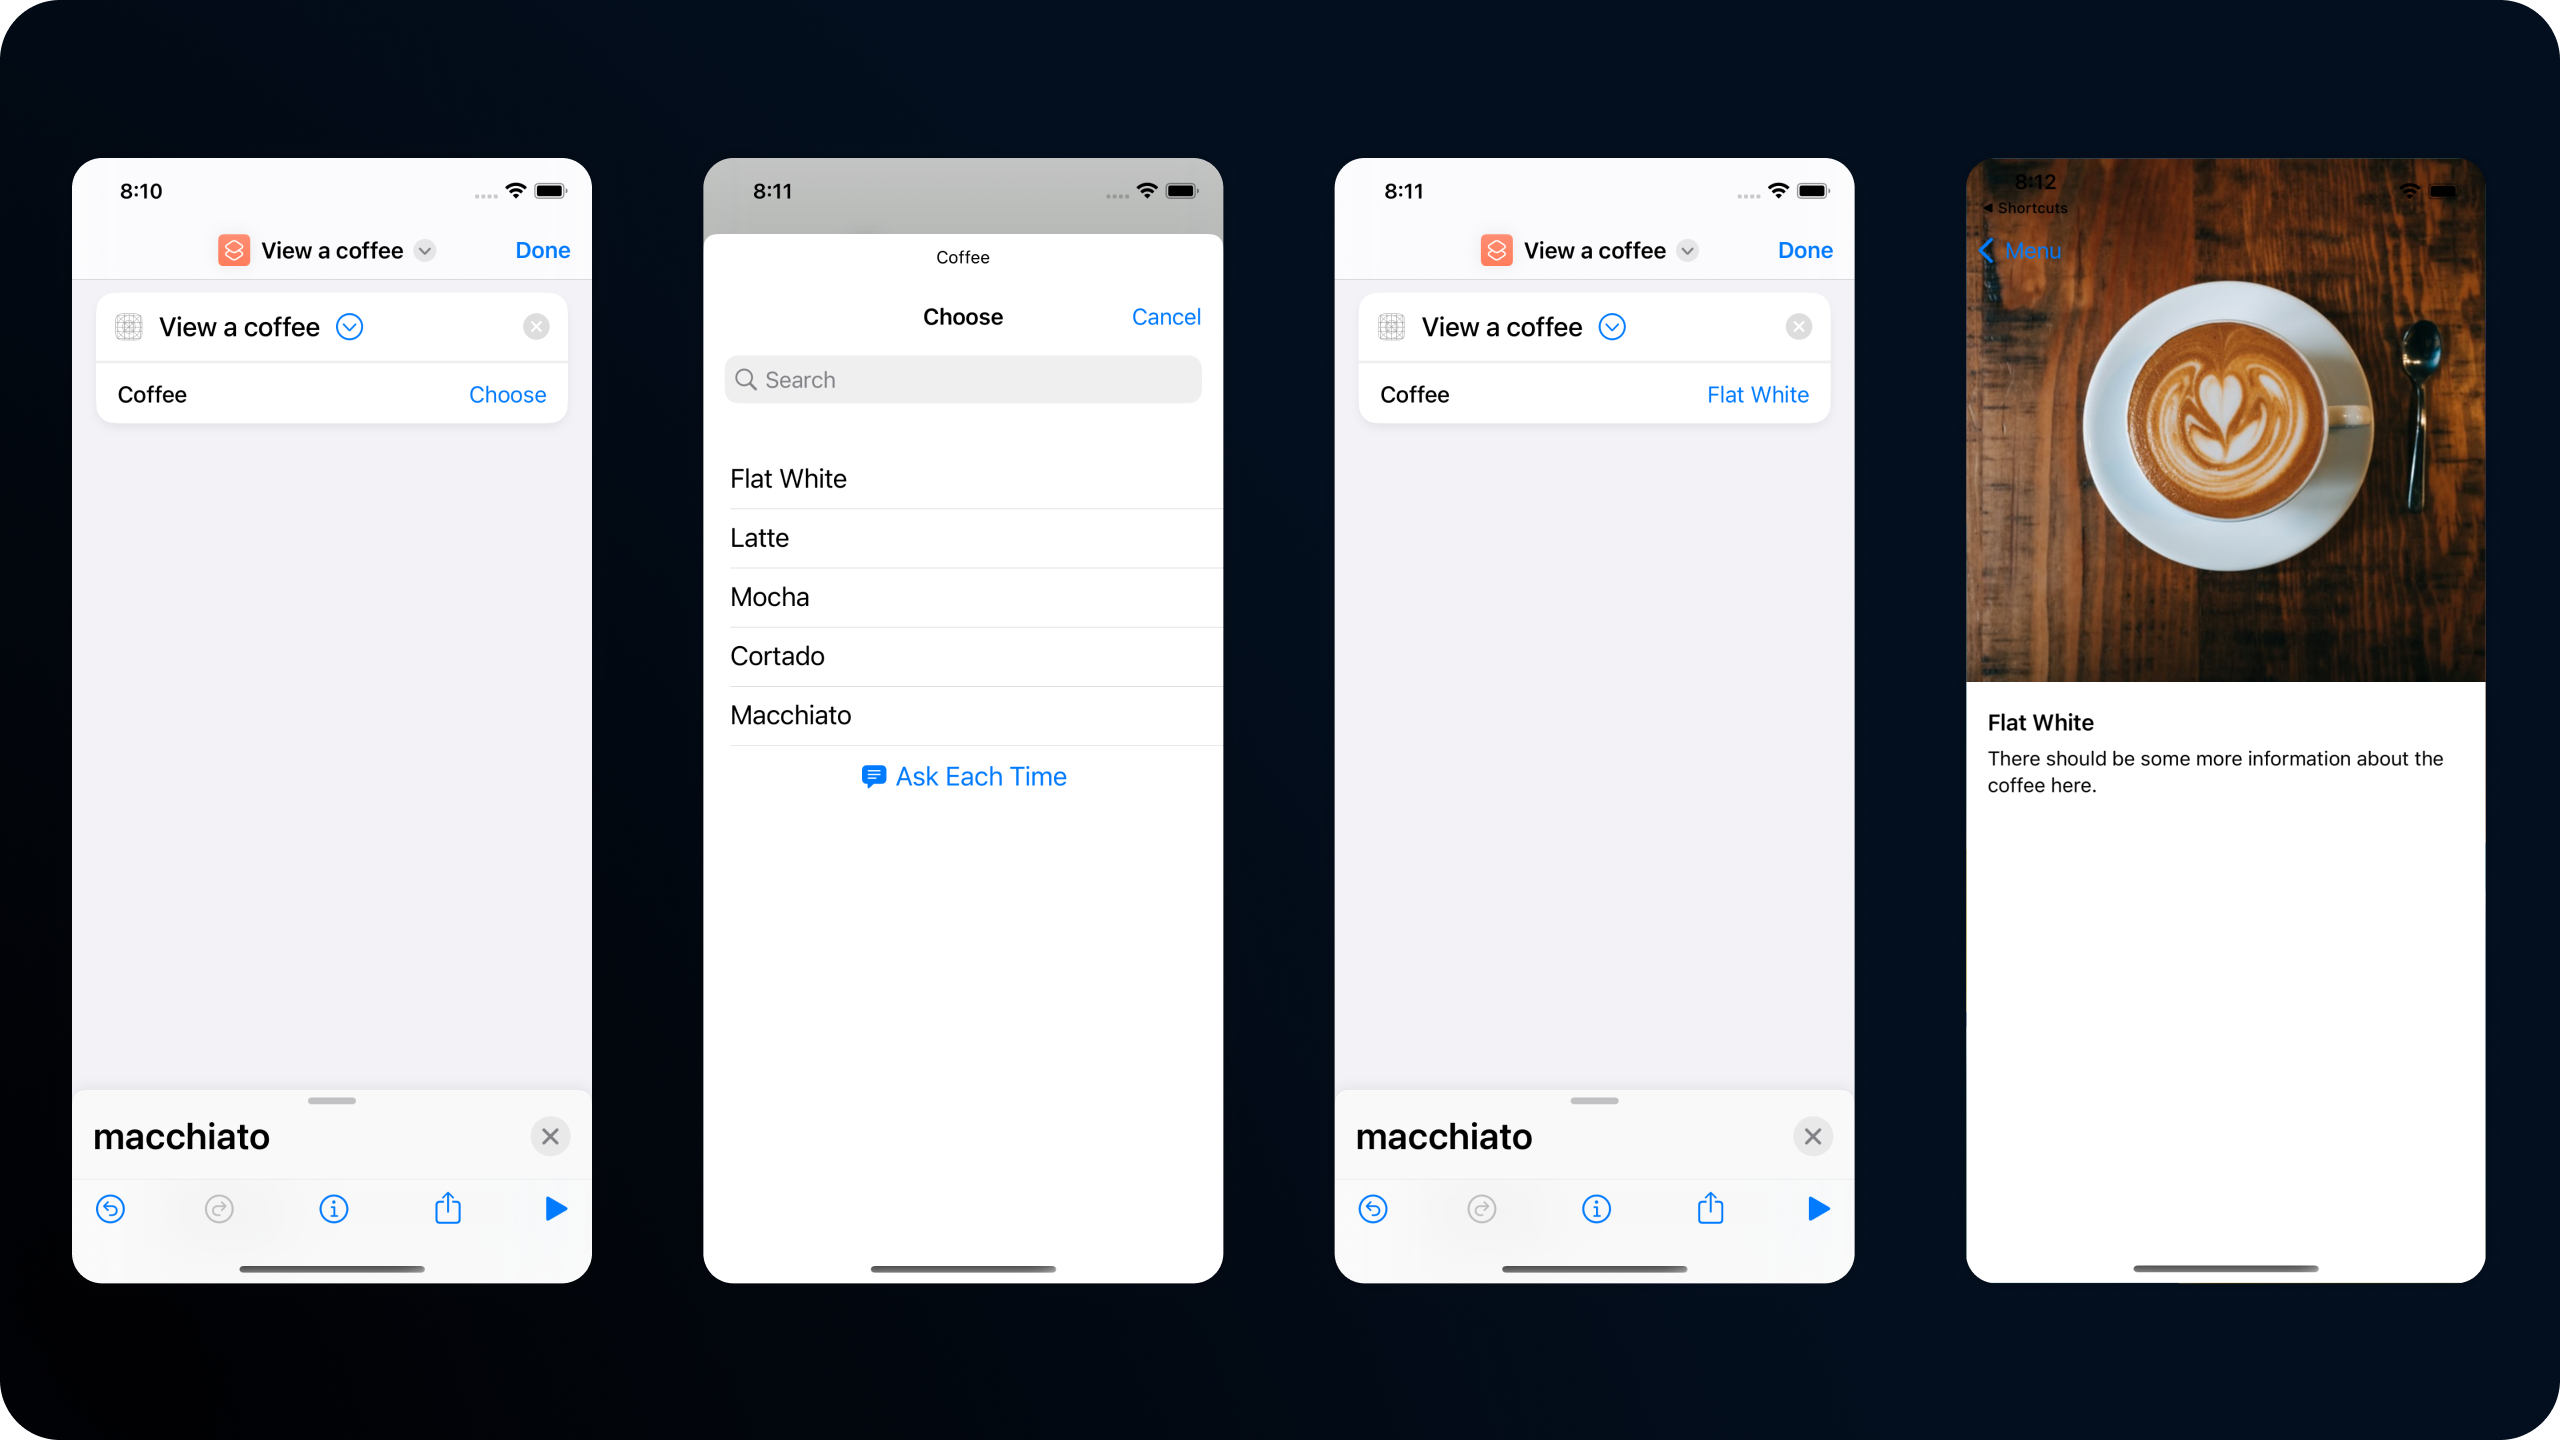
Here's a quick video of that example.
Getting fancy
There's a few new tools that help improve the intents experience. Some are old tech revisited, others are entirely brand new - lets dive in.
First, you can still donate your intents just like you currently can, and there's two ways to do this.
The easiest is directly with your intent object, using donate(result:).
ViewCoffeeIntent(coffee: coffee).donate(result: nil)ViewCoffeeIntent(coffee: coffee).donate(result: nil)The alternative is to use the donation manager, which lets you try catch to detect any errors that may be thrown as you donate.
do {
    let intent = ViewCoffeeIntent(coffee: coffee)
    let manager = IntentDonationManager.shared
    let result: ViewCoffeeIntent.IntentPerformResultType = .finished
    _ = try await manager.donate(intent: intent, result: result)
} catch let error {
    print("Unable to donate ViewCoffeeIntent for \(coffee) due to \(e.localizedDescription)")
}
do {
let intent = ViewCoffeeIntent(coffee: coffee)
let manager = IntentDonationManager.shared
let result: ViewCoffeeIntent.IntentPerformResultType = .finished
_ = try await manager.donate(intent: intent, result: result)
} catch let error {
print("Unable to donate ViewCoffeeIntent for \(coffee) due to \(e.localizedDescription)")
}This code is really verbose, but its to get around some issues with the generics on donate. Im sure in future this call site could be cleaned up, and if it can, I'll be first in line to update!
There's a couple of view views available to us, too!
ShortcutLink is a fantastic new button that will take us right to the shortcuts for our app inside the shortcuts app. Usage is simple as ever.
ShortcutsLink()ShortcutsLink()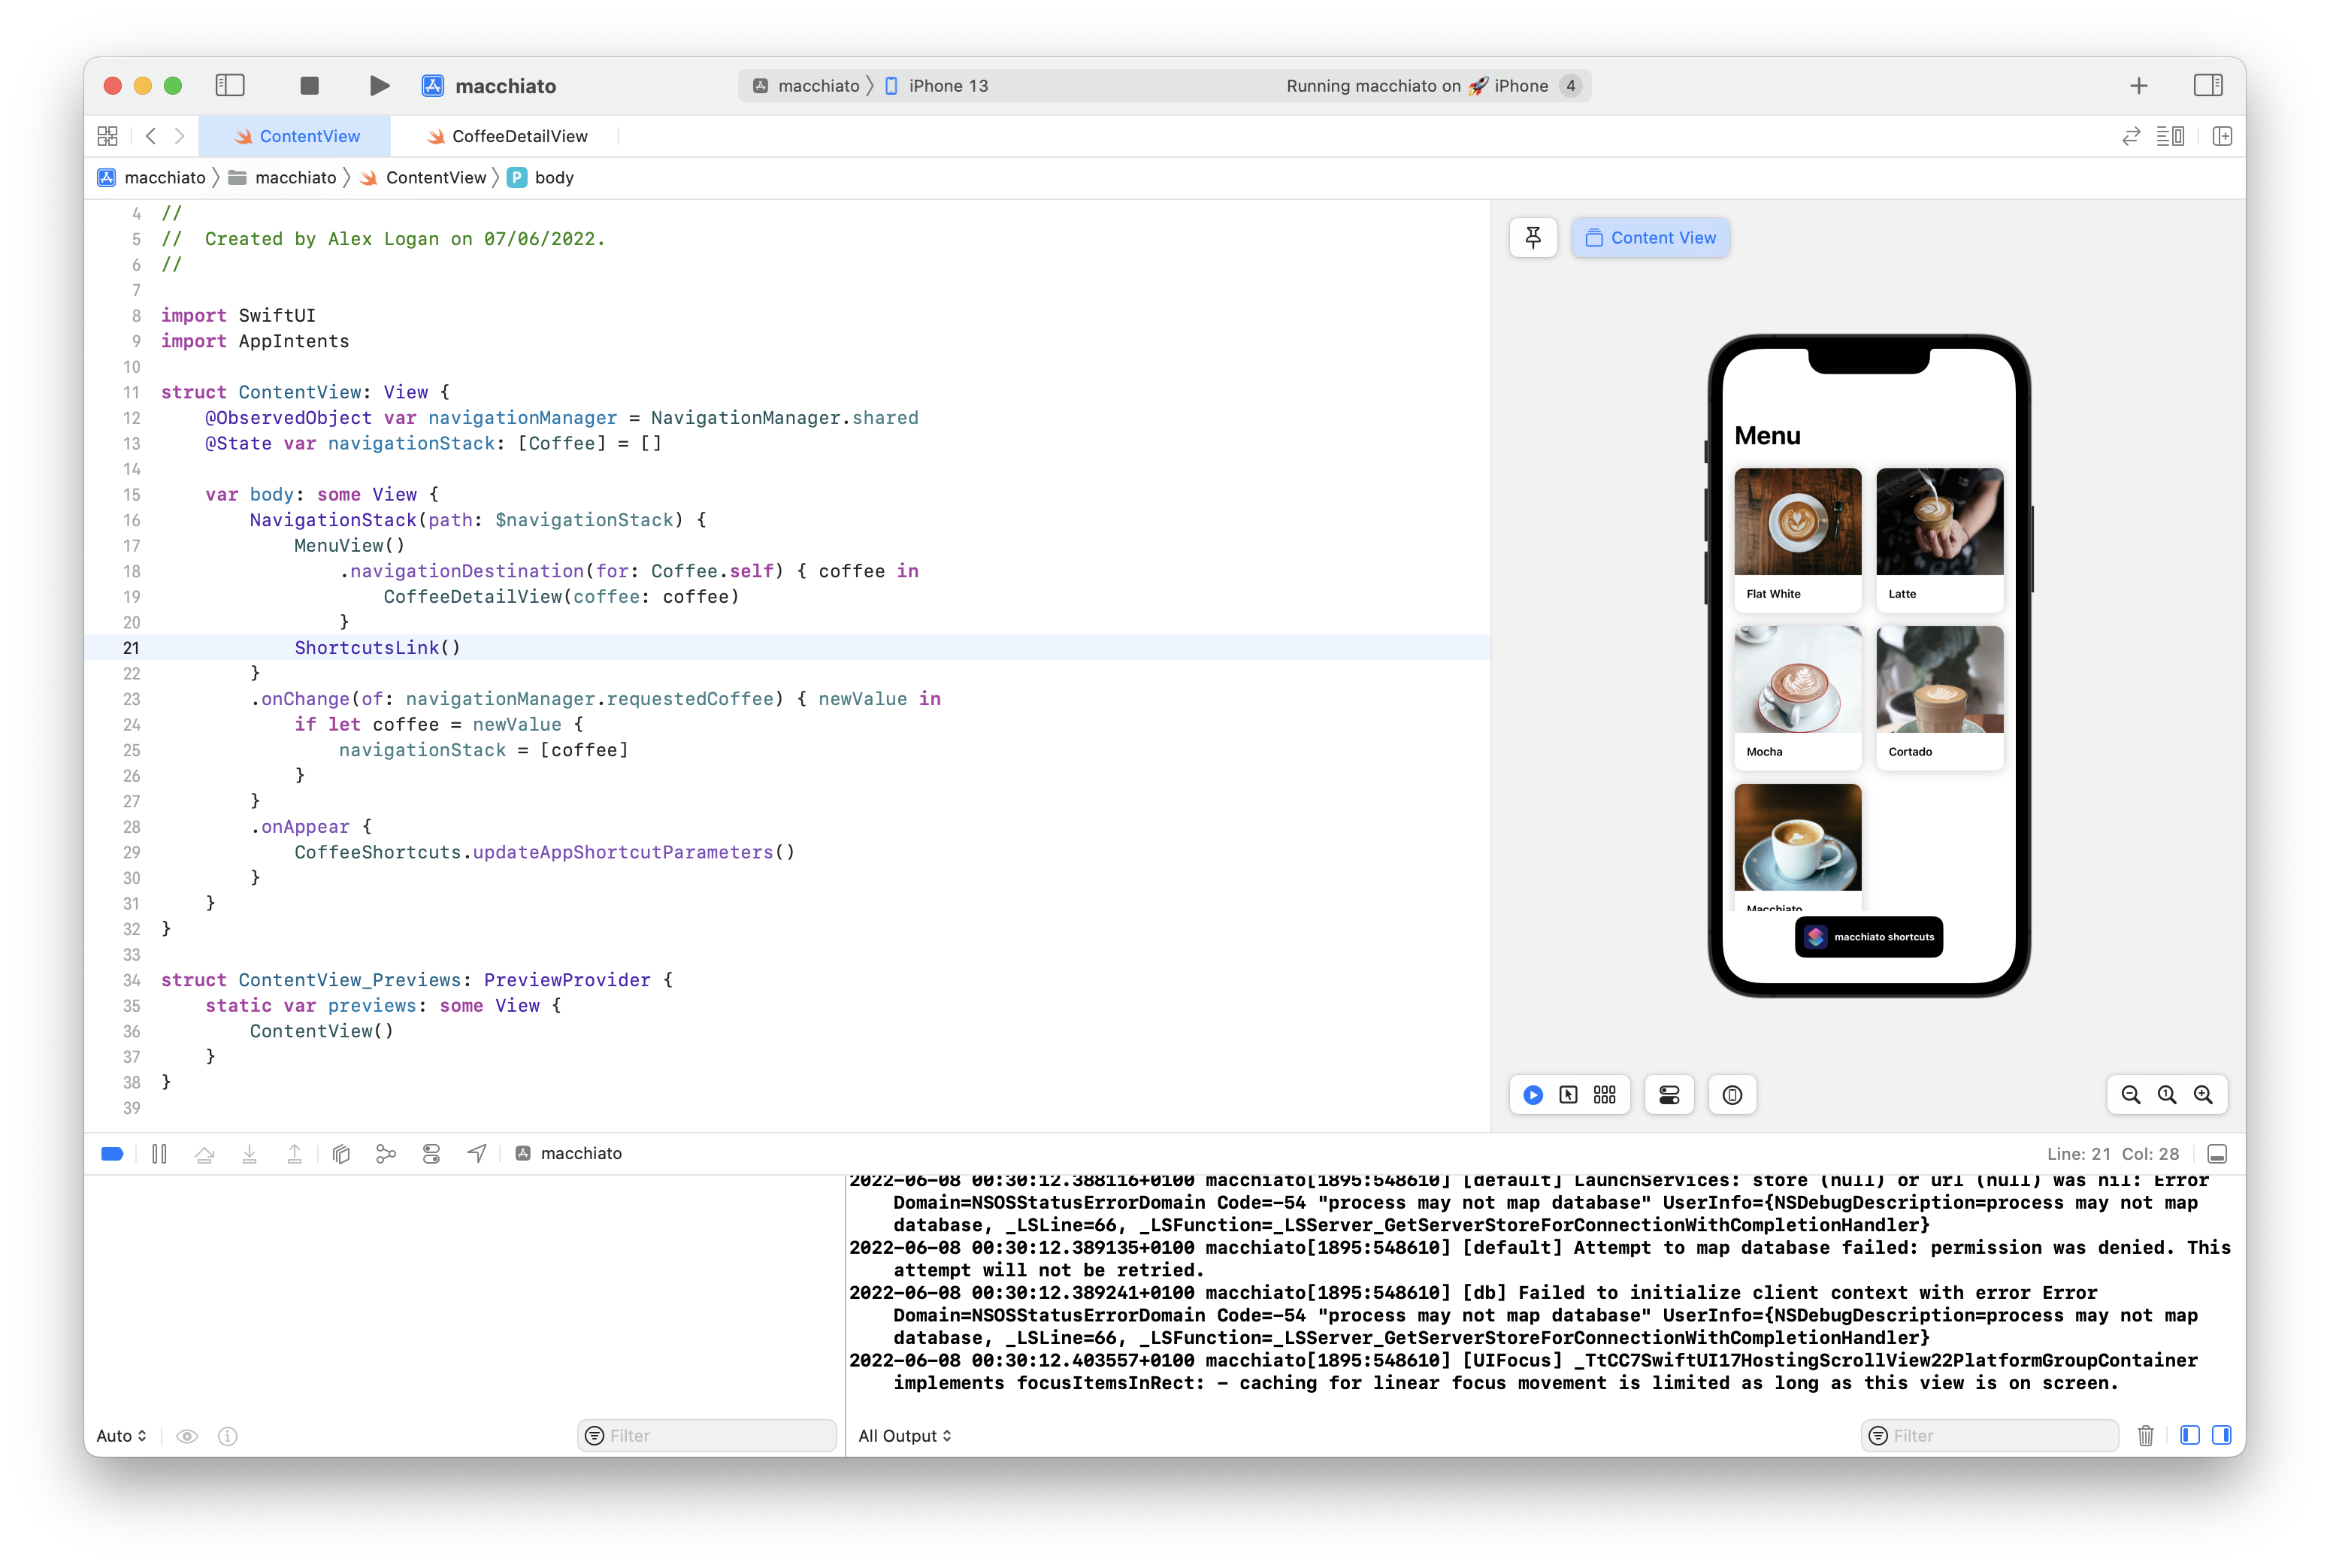
This can also be customised with a style, allowing you to match your app a little better.
ShortcutsLink()
.shortcutsLinkStyle(.whiteOutline)ShortcutsLink()
.shortcutsLinkStyle(.whiteOutline)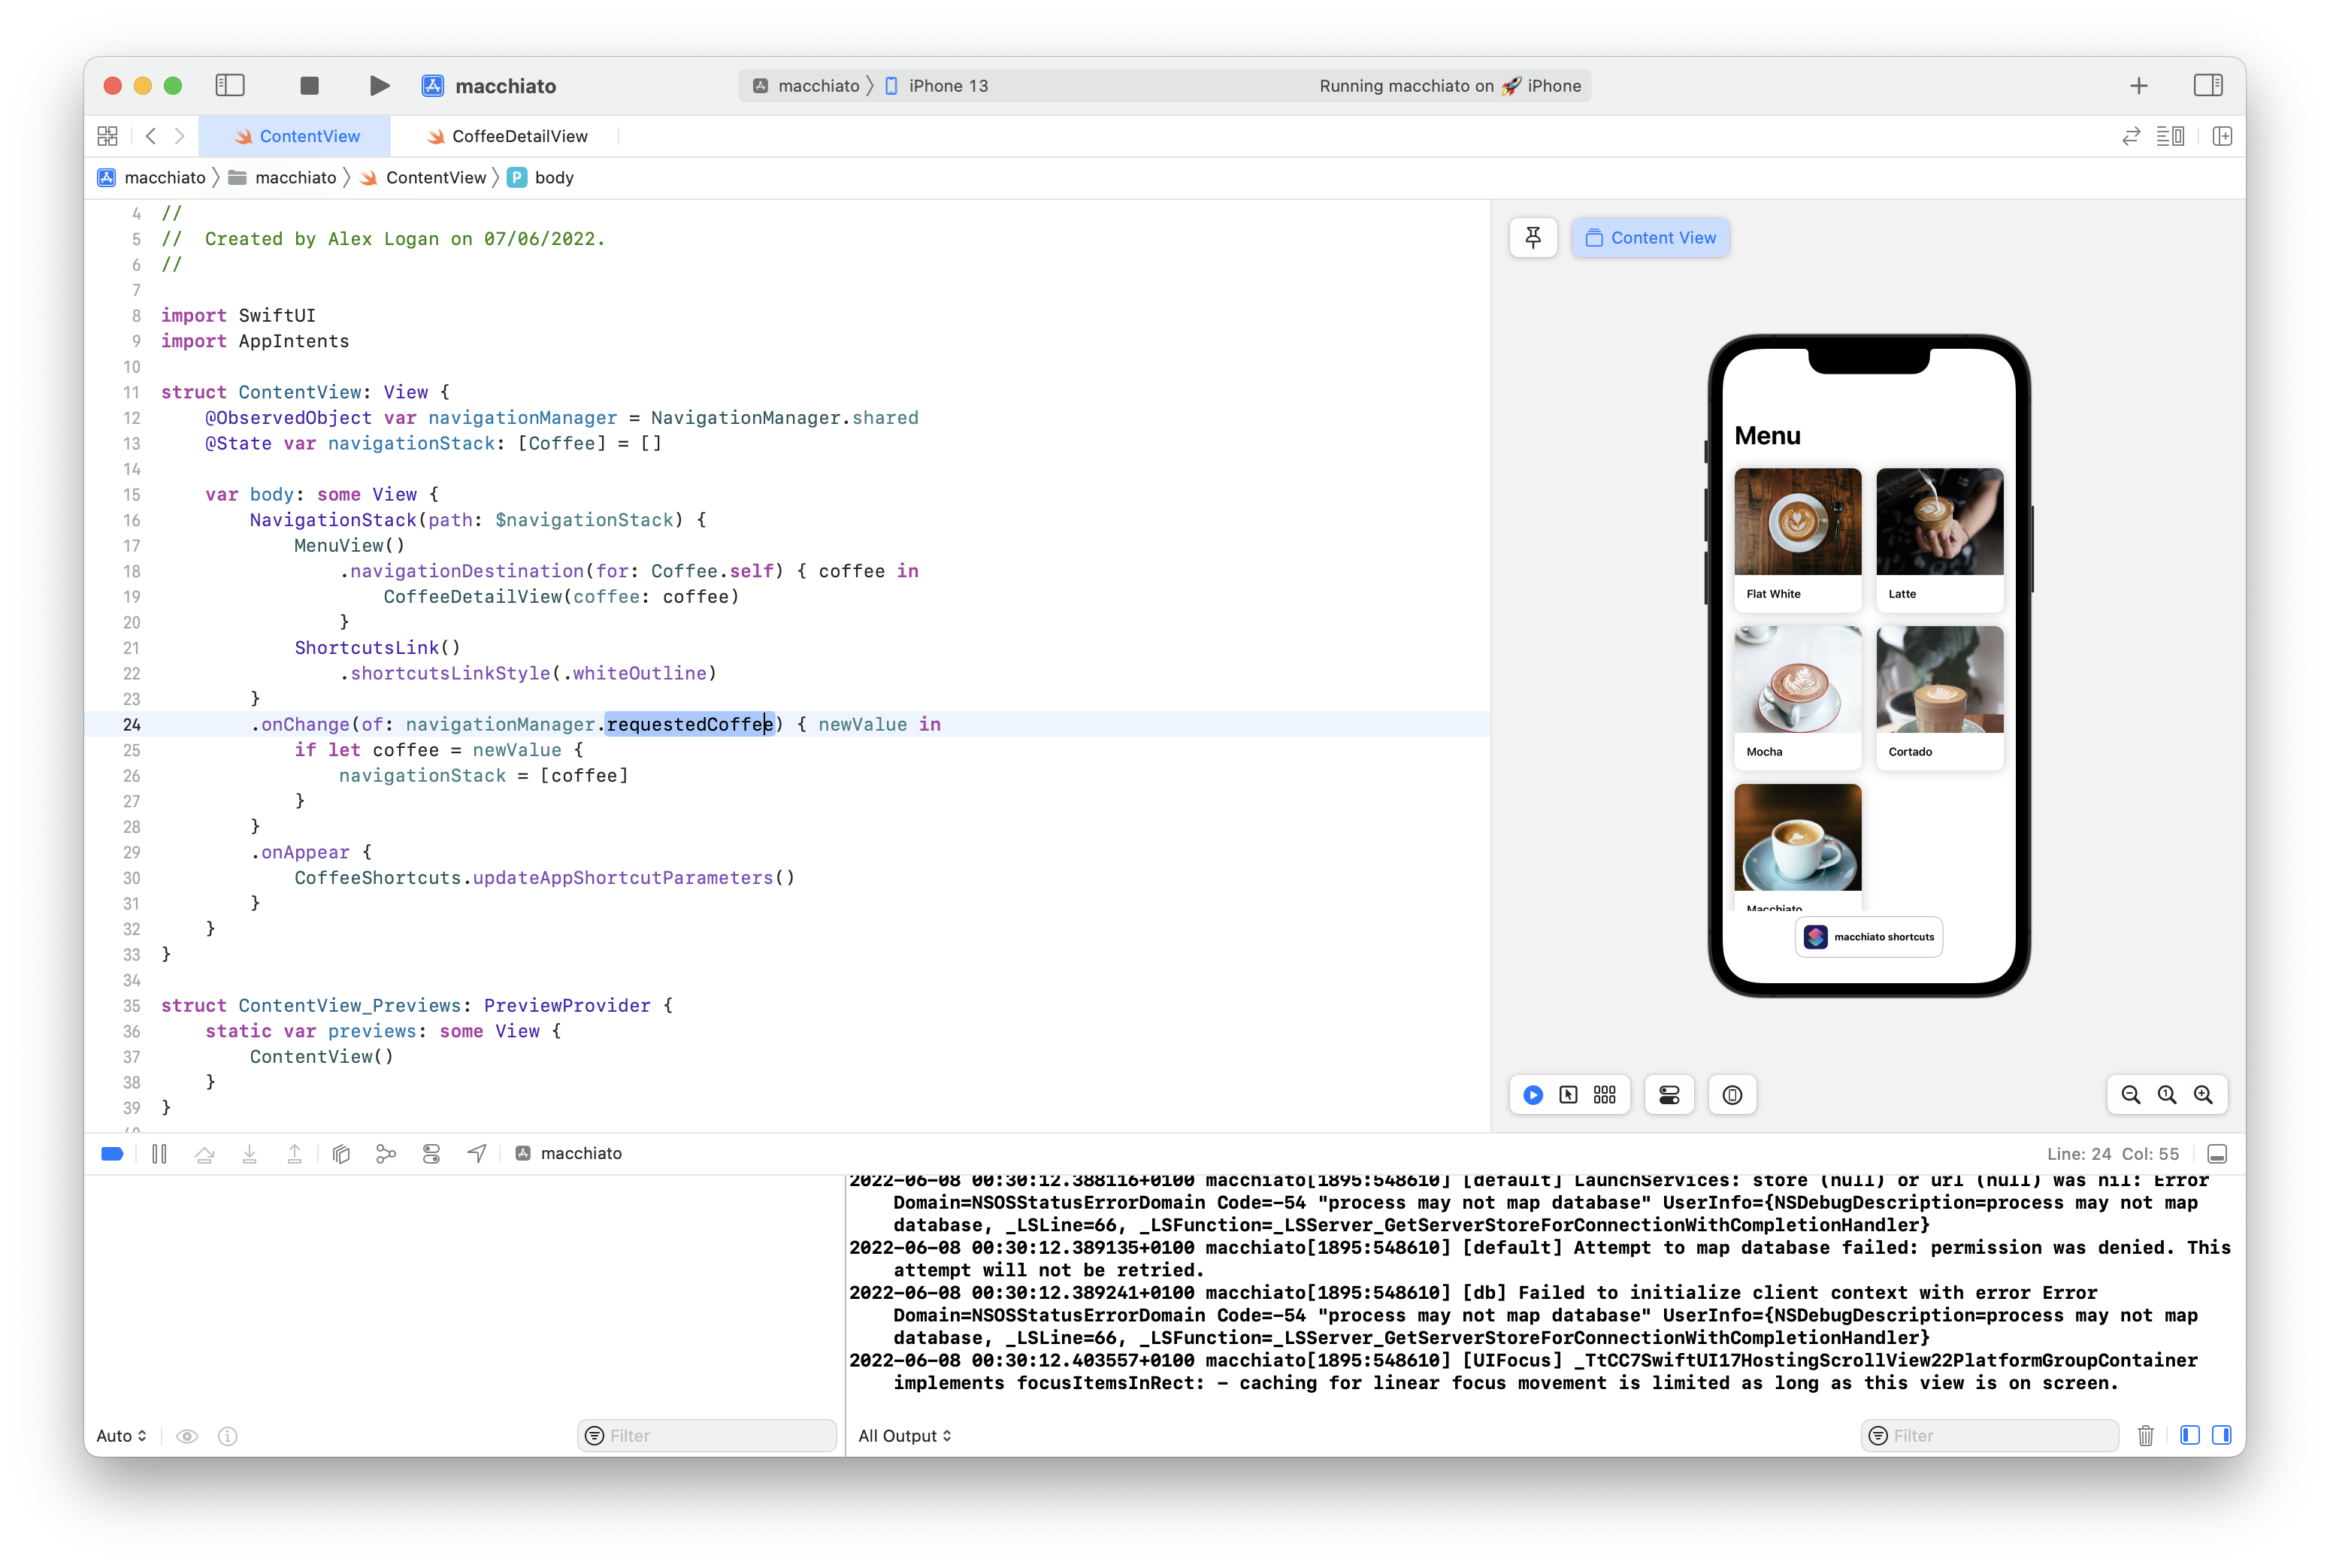
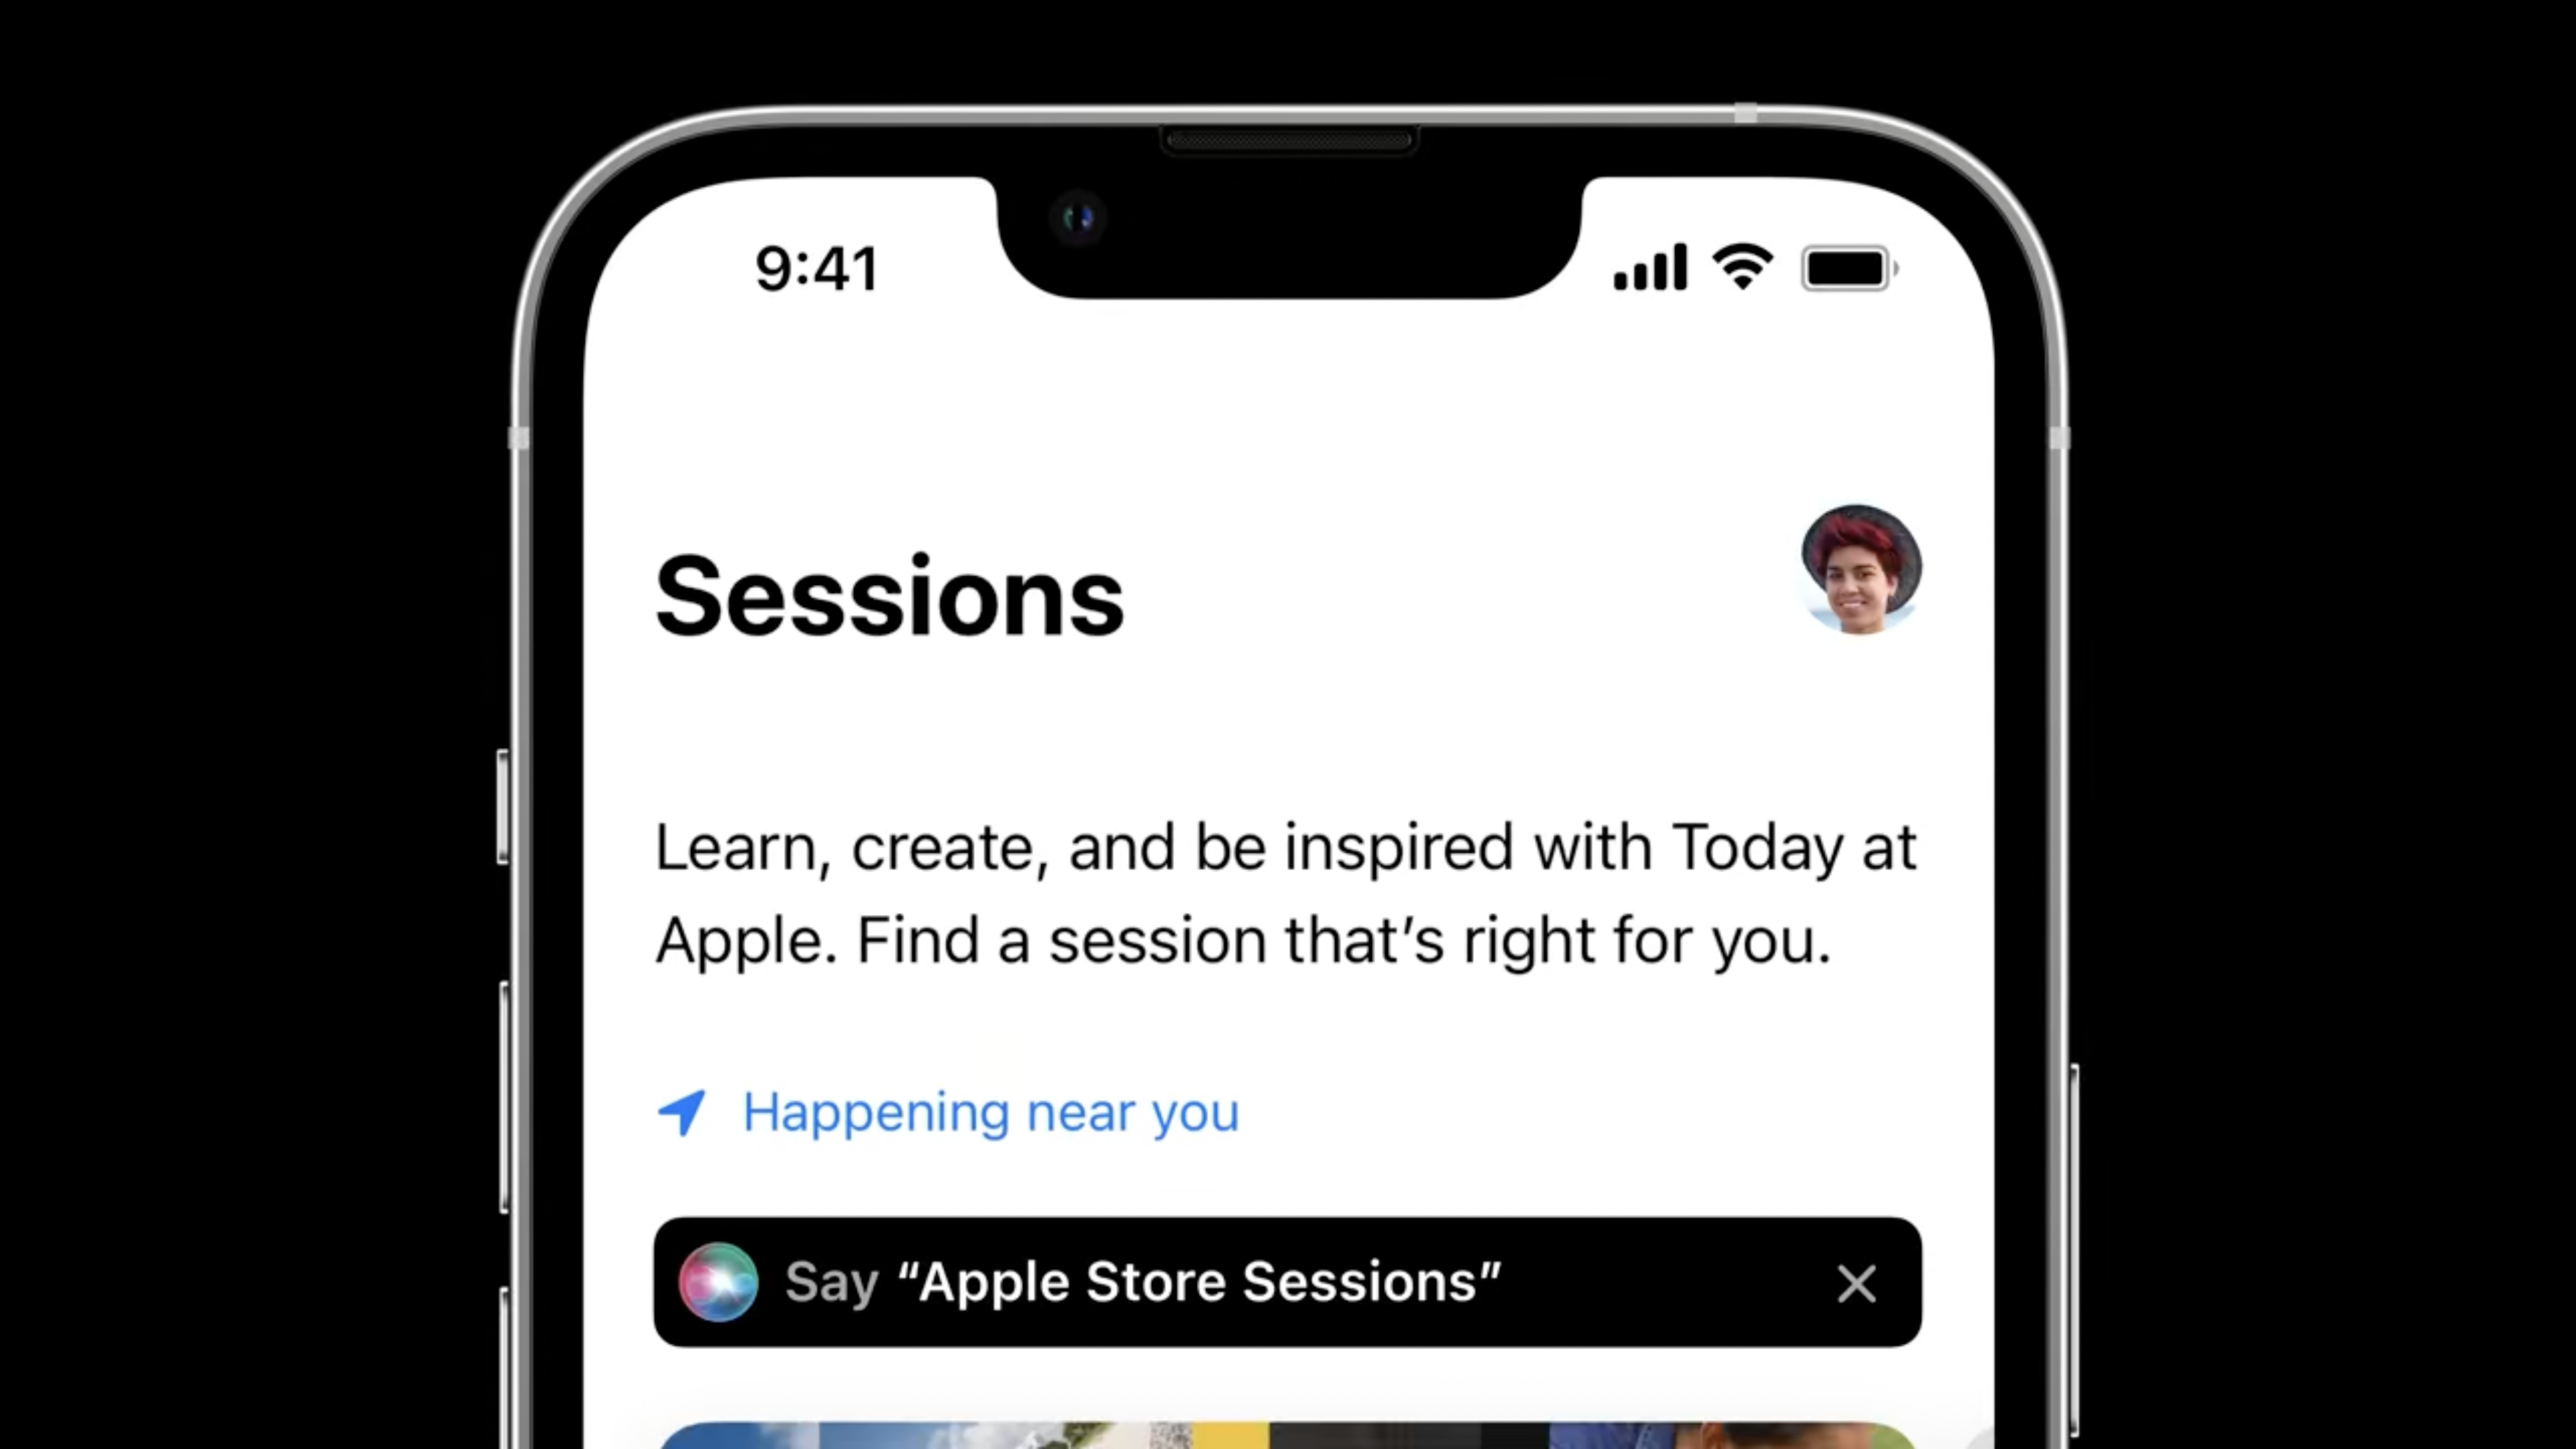
We also have SiriTipView which is a lovely dismissable tip that lets a user know they can use your shortcut. This can also be customised, using a .siriTipViewStyle modifier.
SiriTipView(intent: ViewCoffeeIntent(coffee: coffee))
.siriTipViewStyle(.black)SiriTipView(intent: ViewCoffeeIntent(coffee: coffee))
.siriTipViewStyle(.black)I can't quite show you that one yet due to issues in beta one, but here's what it should look like.
The sample code is here in the meantime.