
Starter Workflows with Xcode Cloud
Xcode Cloud is available for beta access if you sign up via Apple Developer. Its Apple's own in-house CI solution that should offer a very simple entry point for developers looking to get started with CI. In this post today, I'll set up my two most common workflows, push to TestFlight for any push to my develop branch, and just build the app for any push to a PR. This setup might be all you need for a fully functioning workflow.
Building apps for Testflight
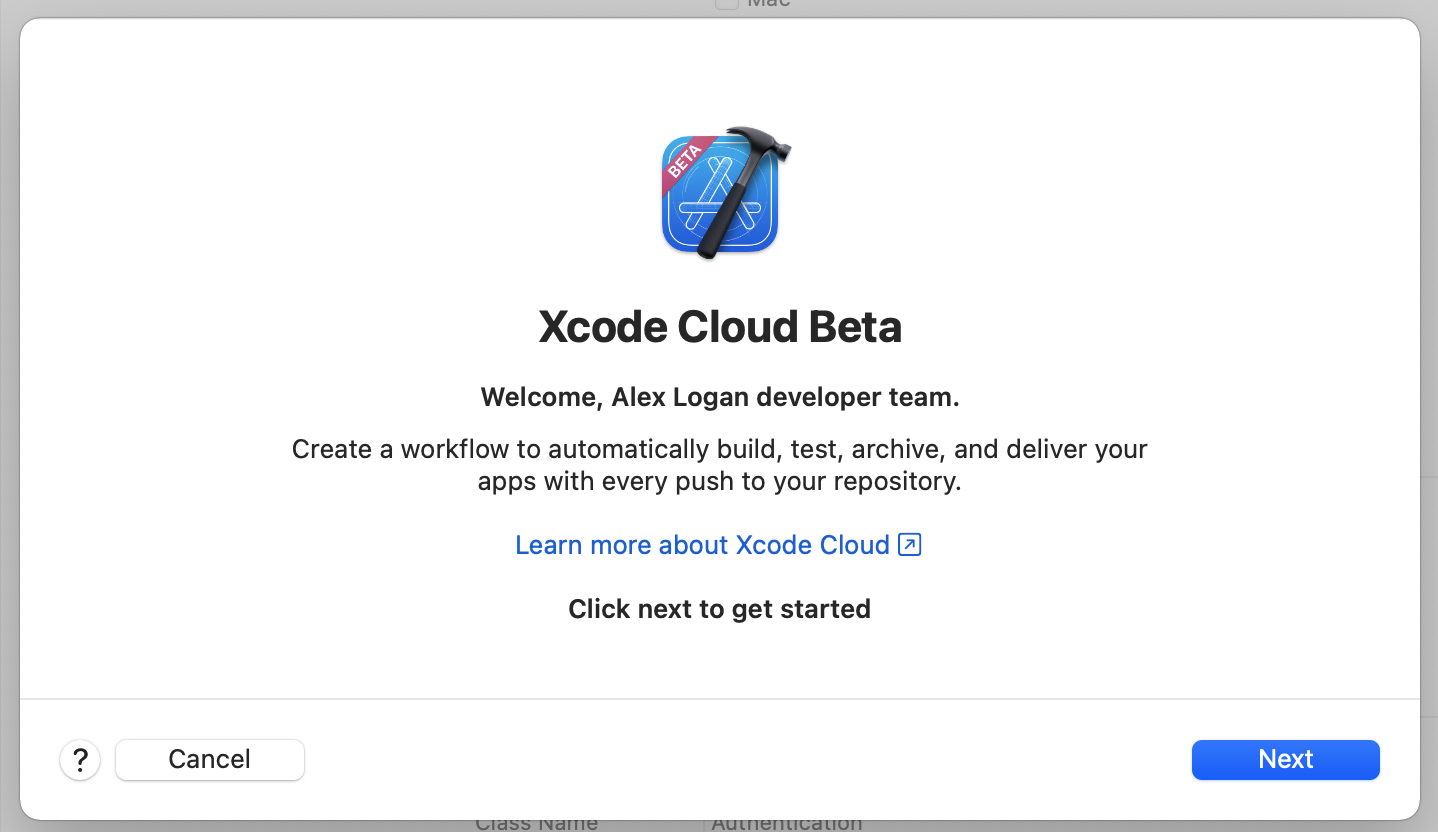
Xcode Cloud is found within Xcode itself, so thats where we'll start. Head to the report navigator and select the new cloud option, where you'll be prompted to create a workflow. Tap next on the pop-up and select your product from the list. In this case, i'll be using my app Coffee Book.
The default workflow looks a little something like this.
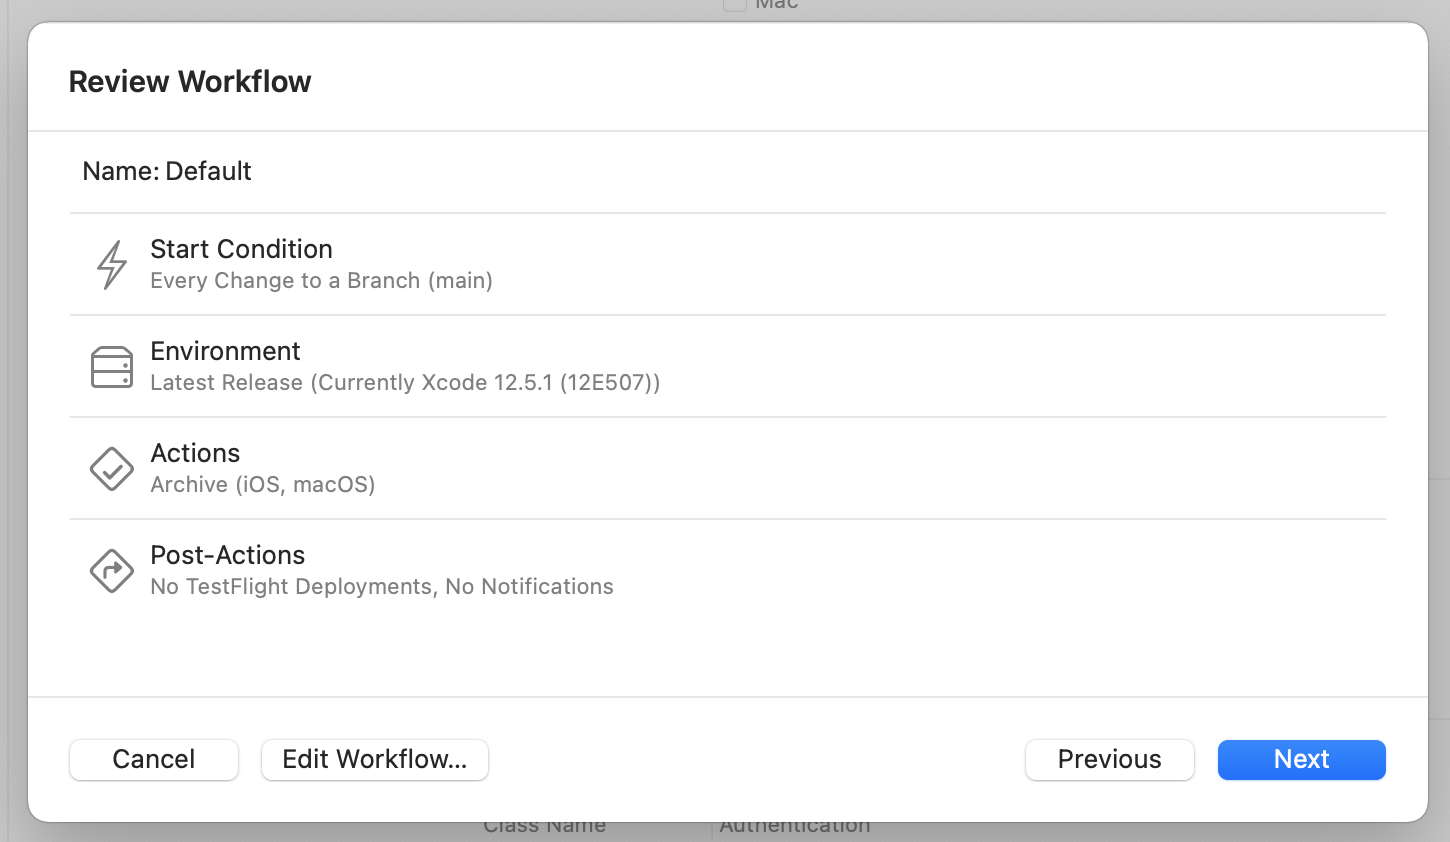
This is a pretty simple workflow that I'd say will work nicely for your day to day builds. I'd use something like this as a sanity check to make sure any pushes to main don't fail.
I want to try and re-create the workflow that I built in a recent post for Bitrise, which will post builds to testflight on successful completion.
Select edit Workflow, and you can then configure something a little more custom.
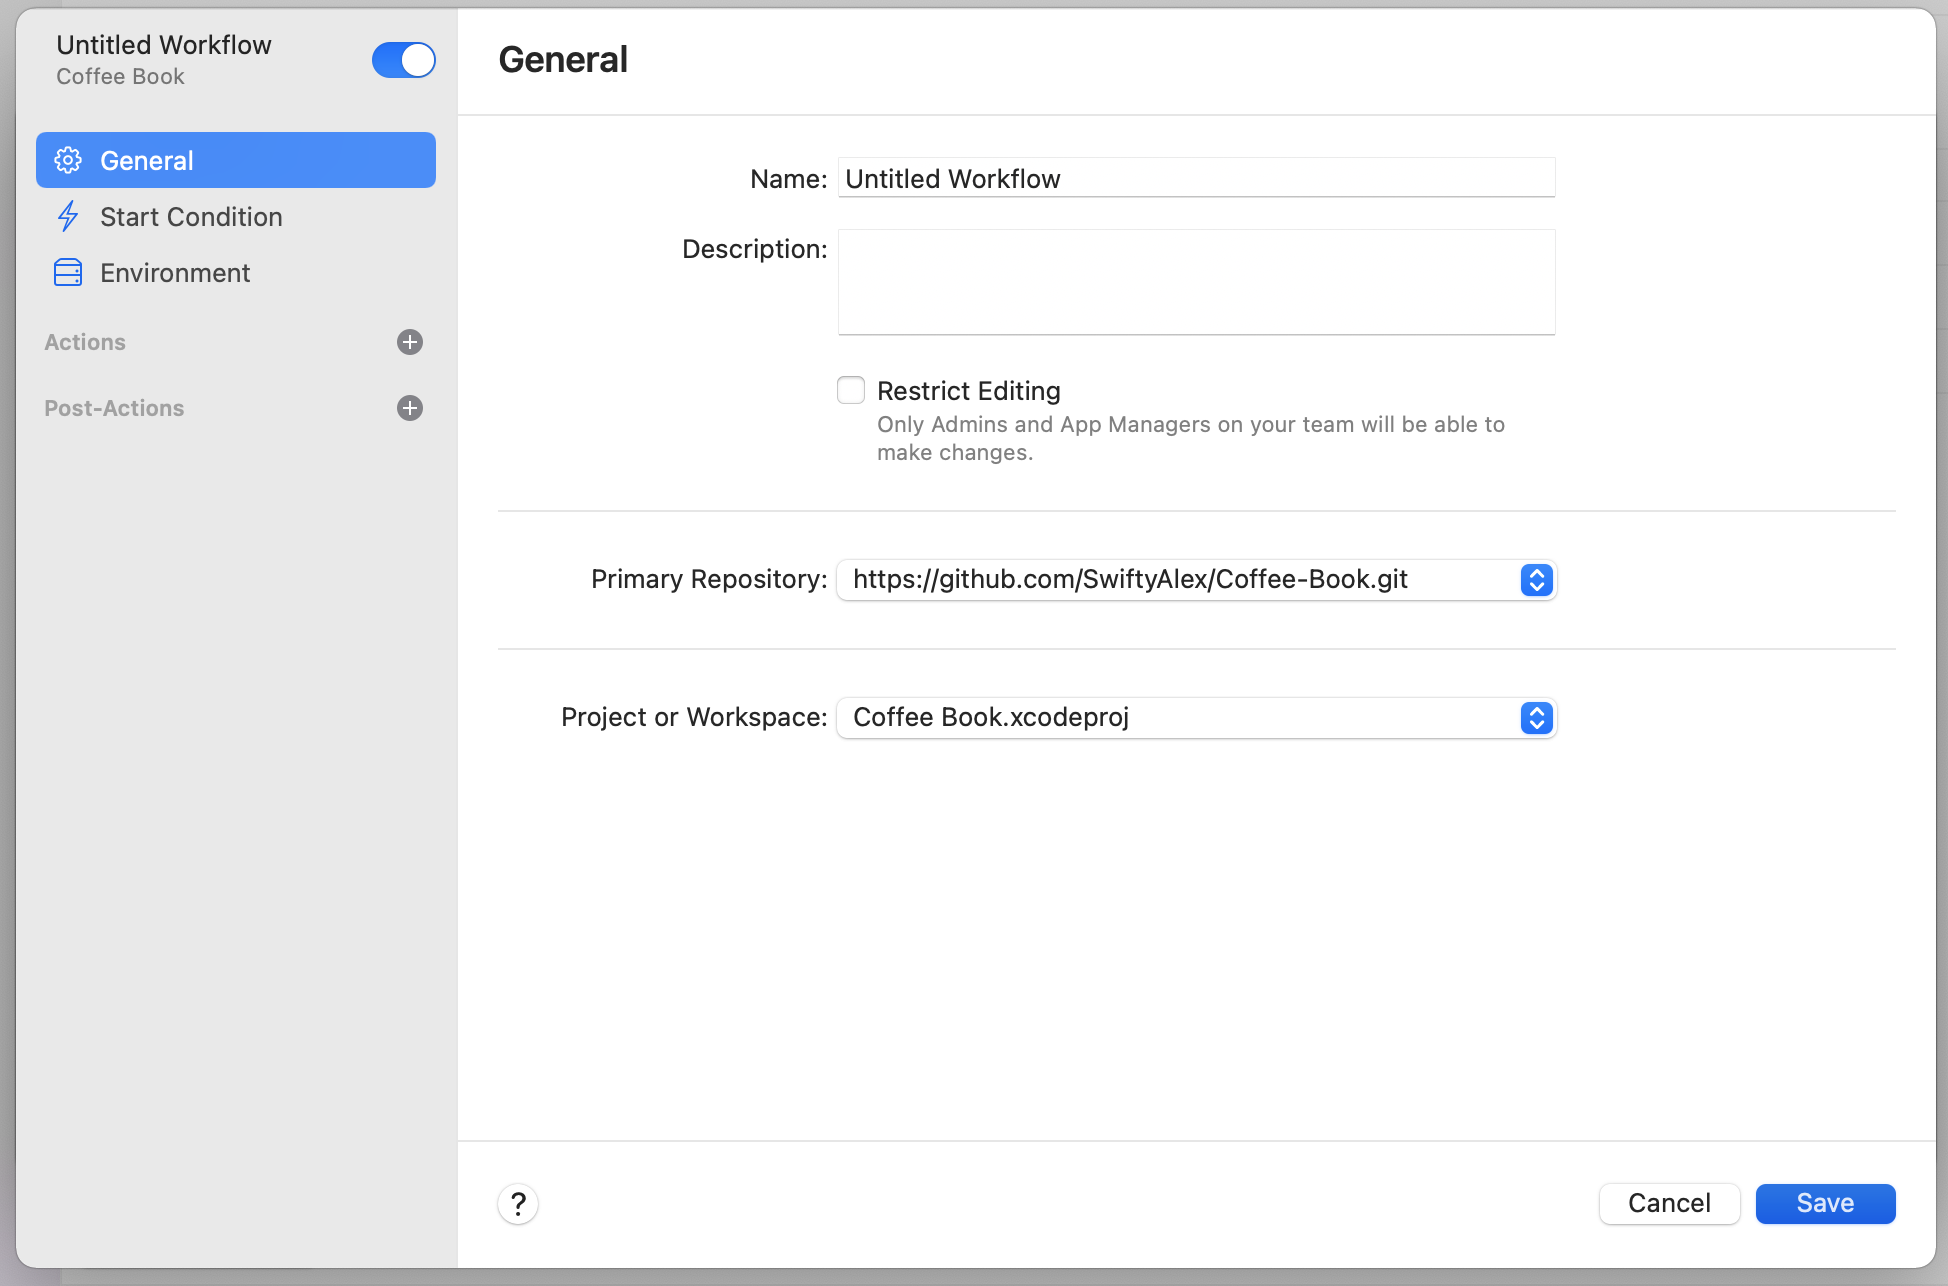
Under general, make sure to give this flow a meaningful name and description. For me, I went with "TestFlight". You can also change the repository if needed.

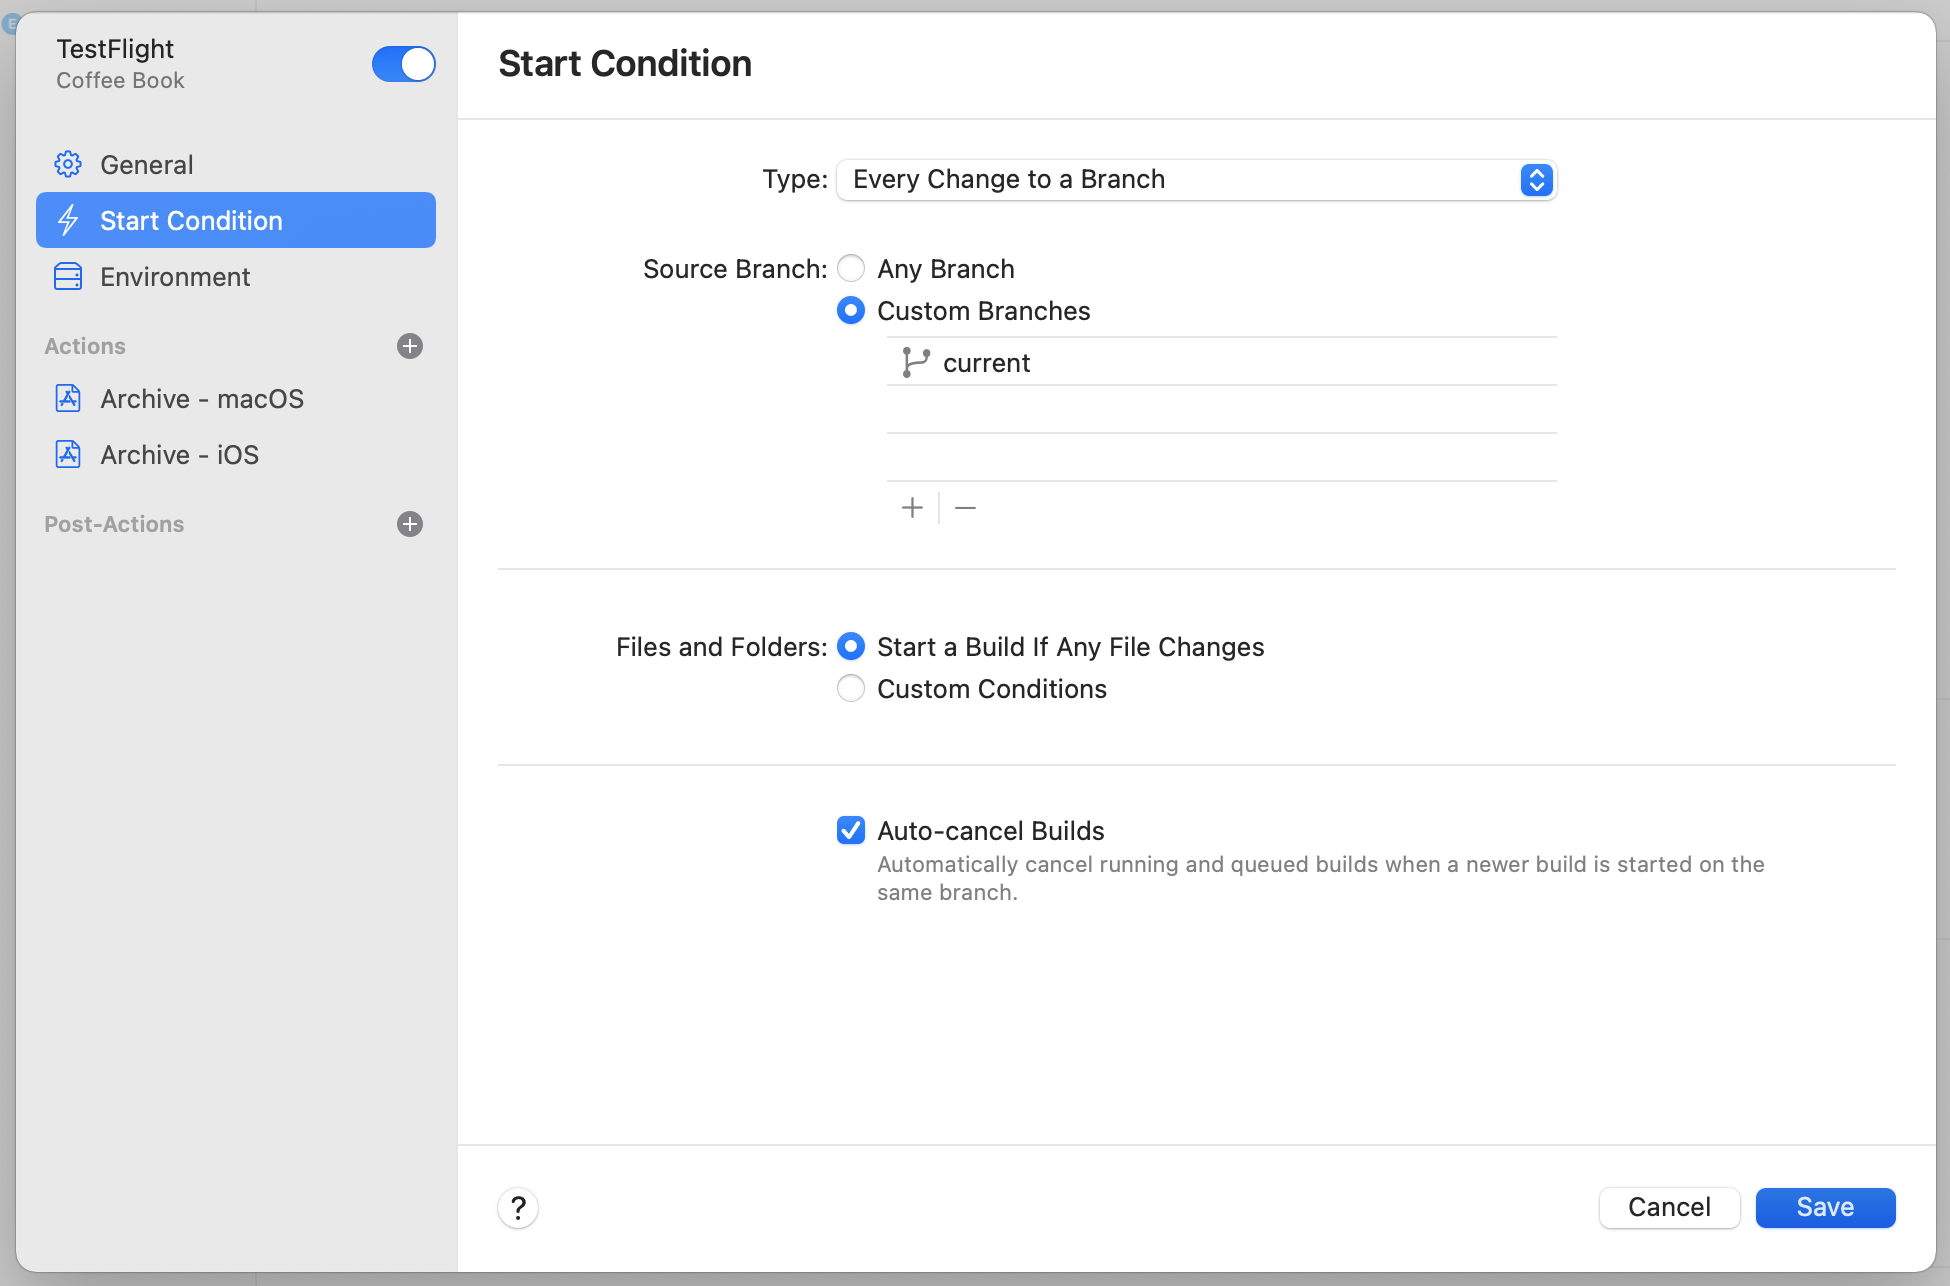
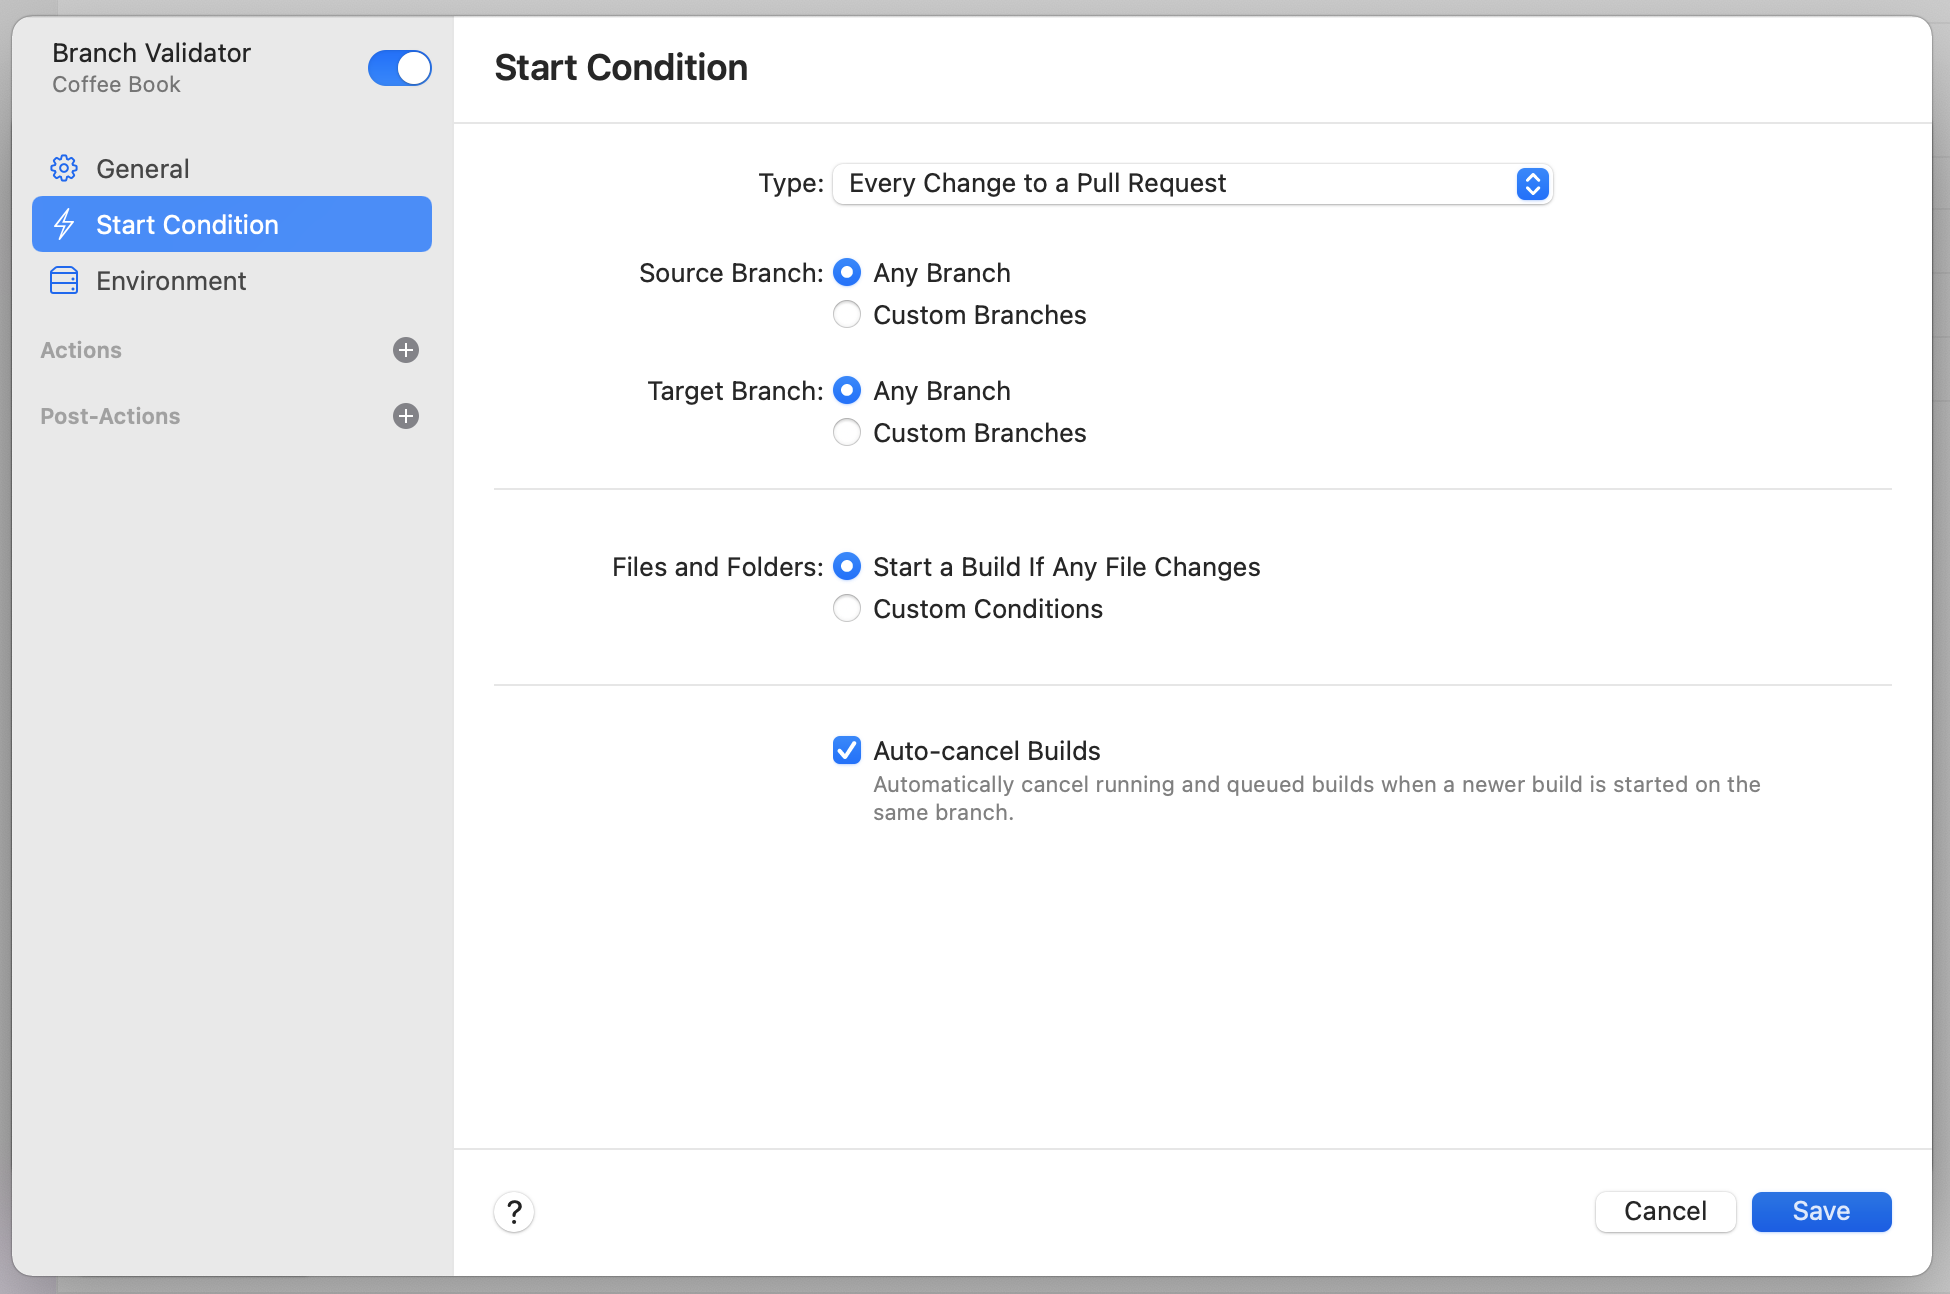
The start condition for me is something a little different than just pushes to main - I have a branch called current which I use in-place of develop, and its the destination for all my PR's. To change the branch, click on the plus button and add the branch you want. I also selected main and removed it with the minus button. We'll re-visit this later to create a generic build workflow, which won't push to TestFlight.
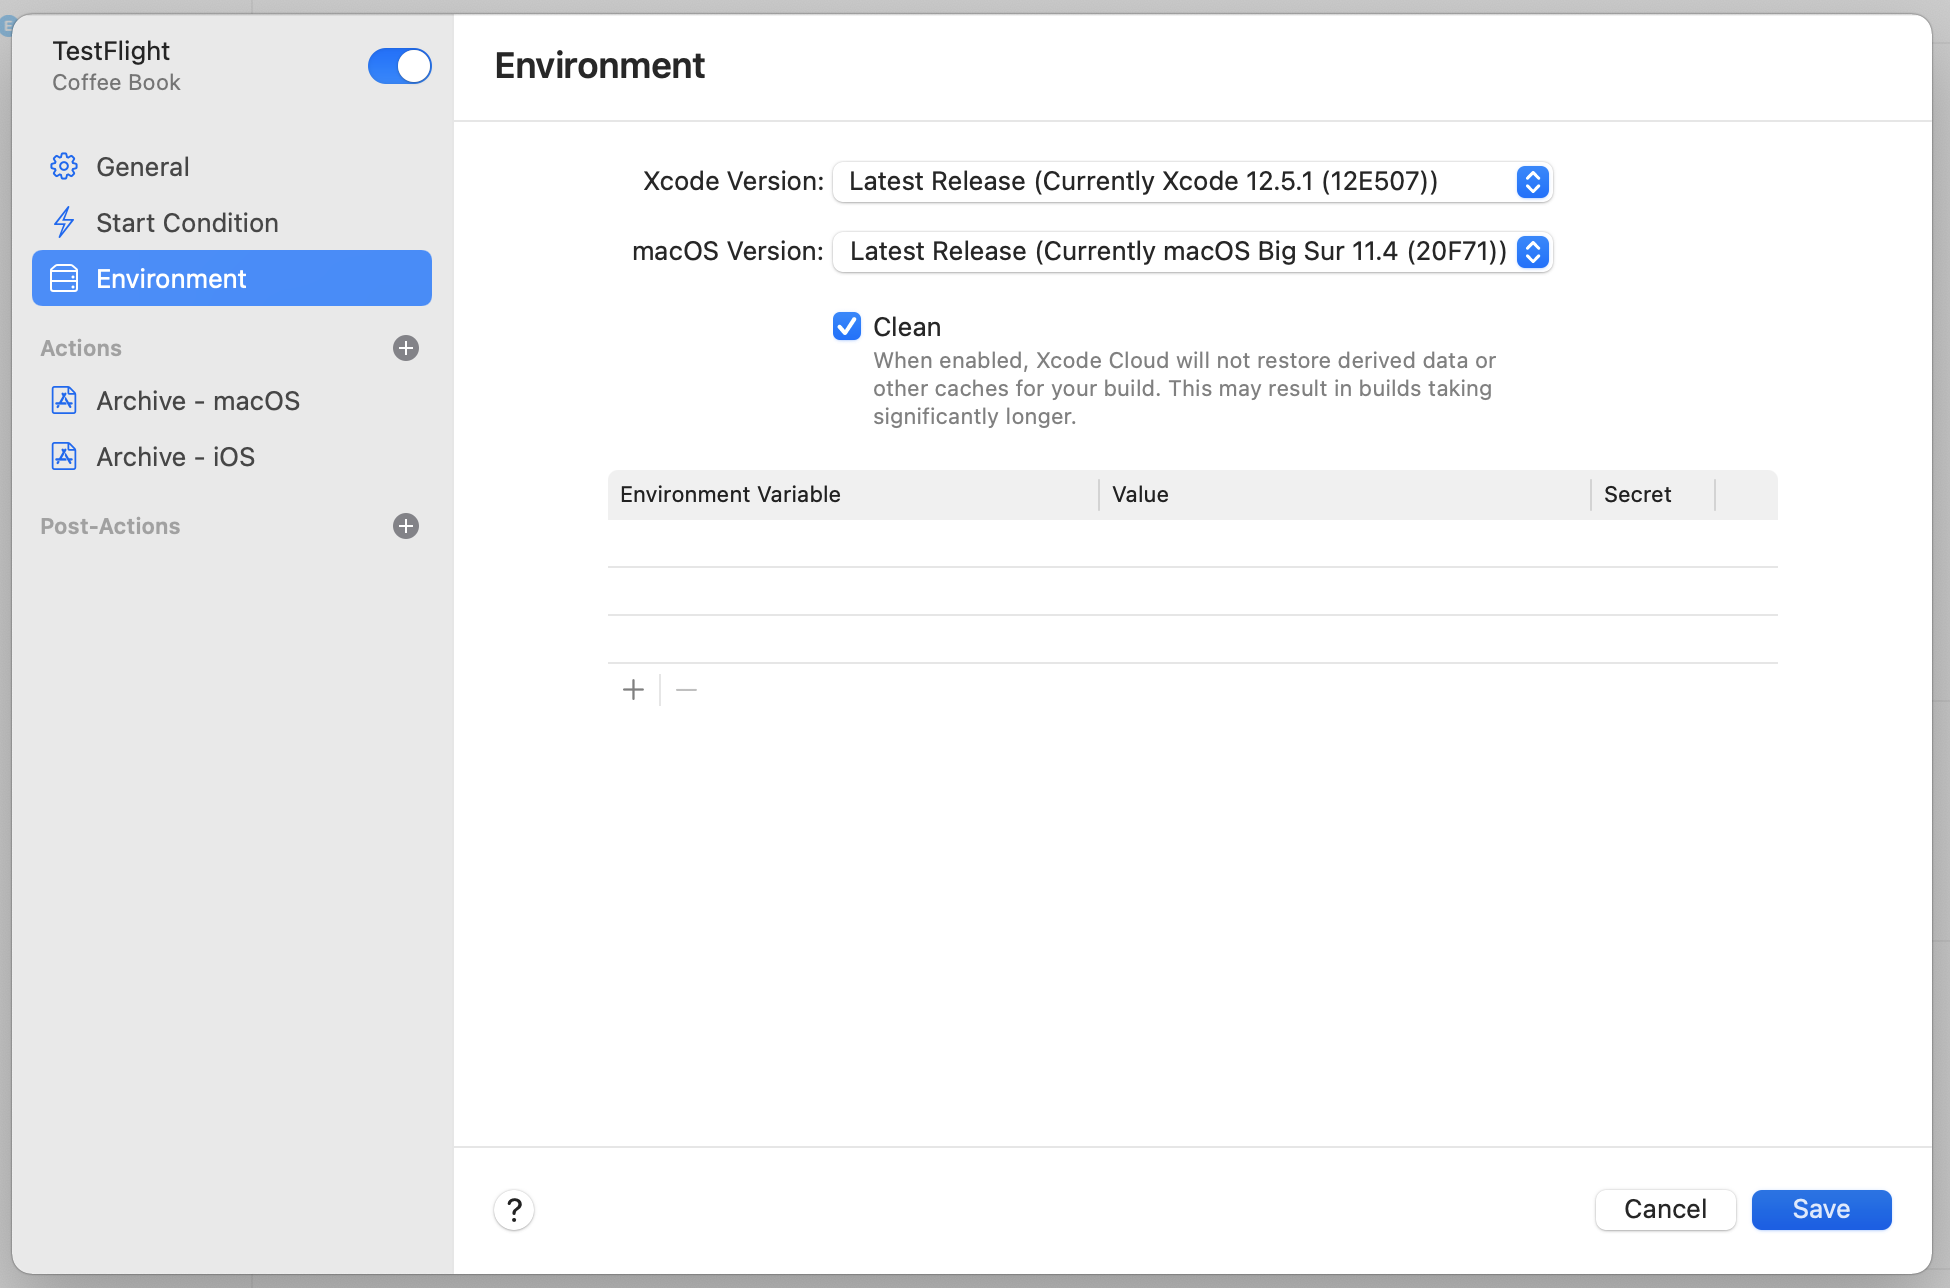
Next, we need to setup the environment. Xcode lets you select the latest release, or even the latest beta, so you'll be able to run experimental builds if you'd like. I'm going to use this in production right away, so i'll be setting the latest release instead of beta.
Be sure to select the clean option, as this is also required for App Store builds.
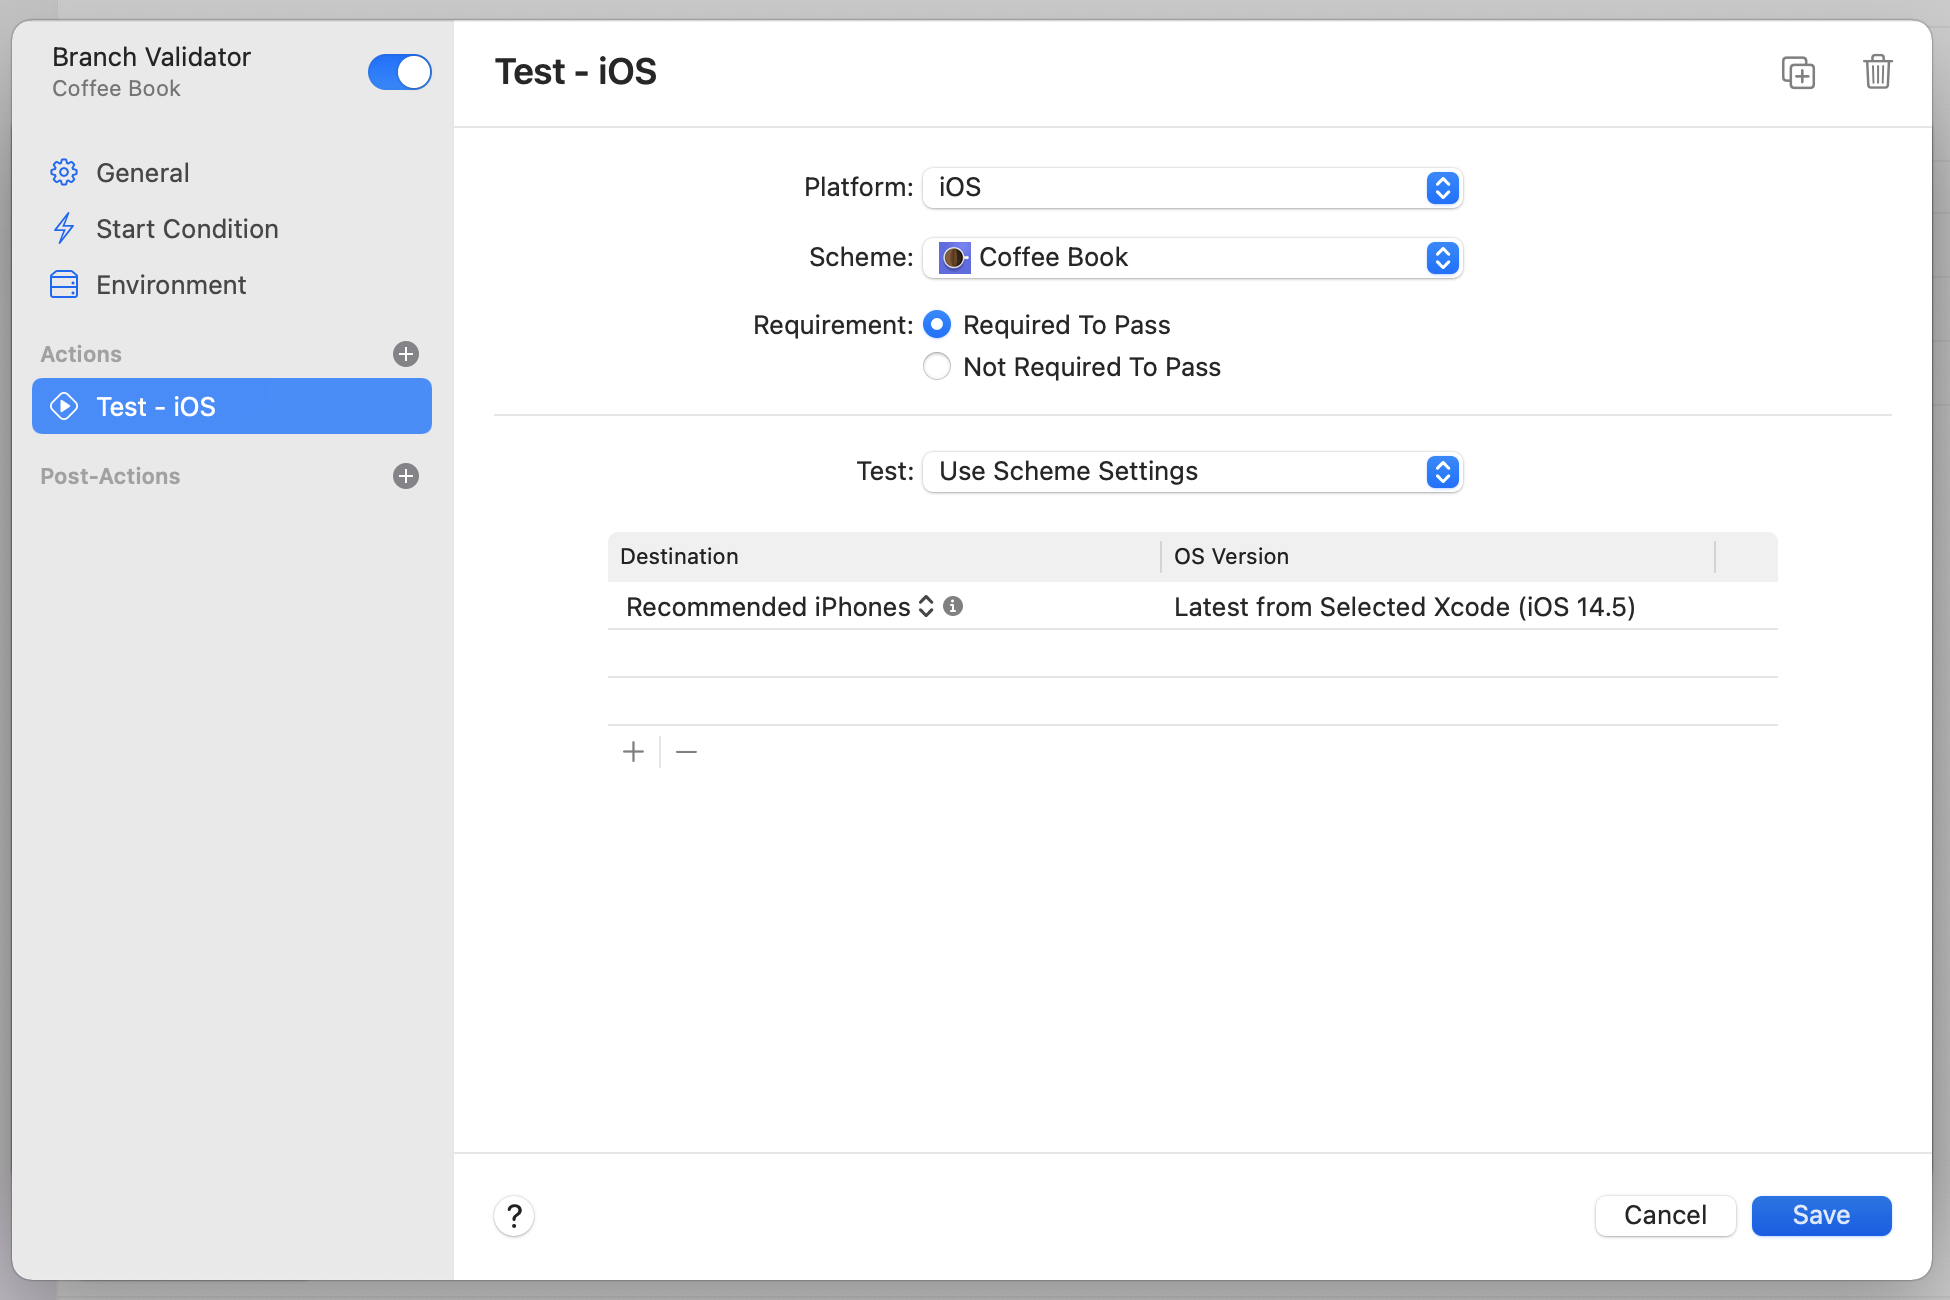
We're going to want to make sure these builds are good before they go out to the world, so lets make sure that the tests succeed. Tap the plus next to actions to add a test action. Make sure its set to required to pass, and that you add the devices you want the tests to run on. For me, thats iPhones and iPads as my app runs on everything.

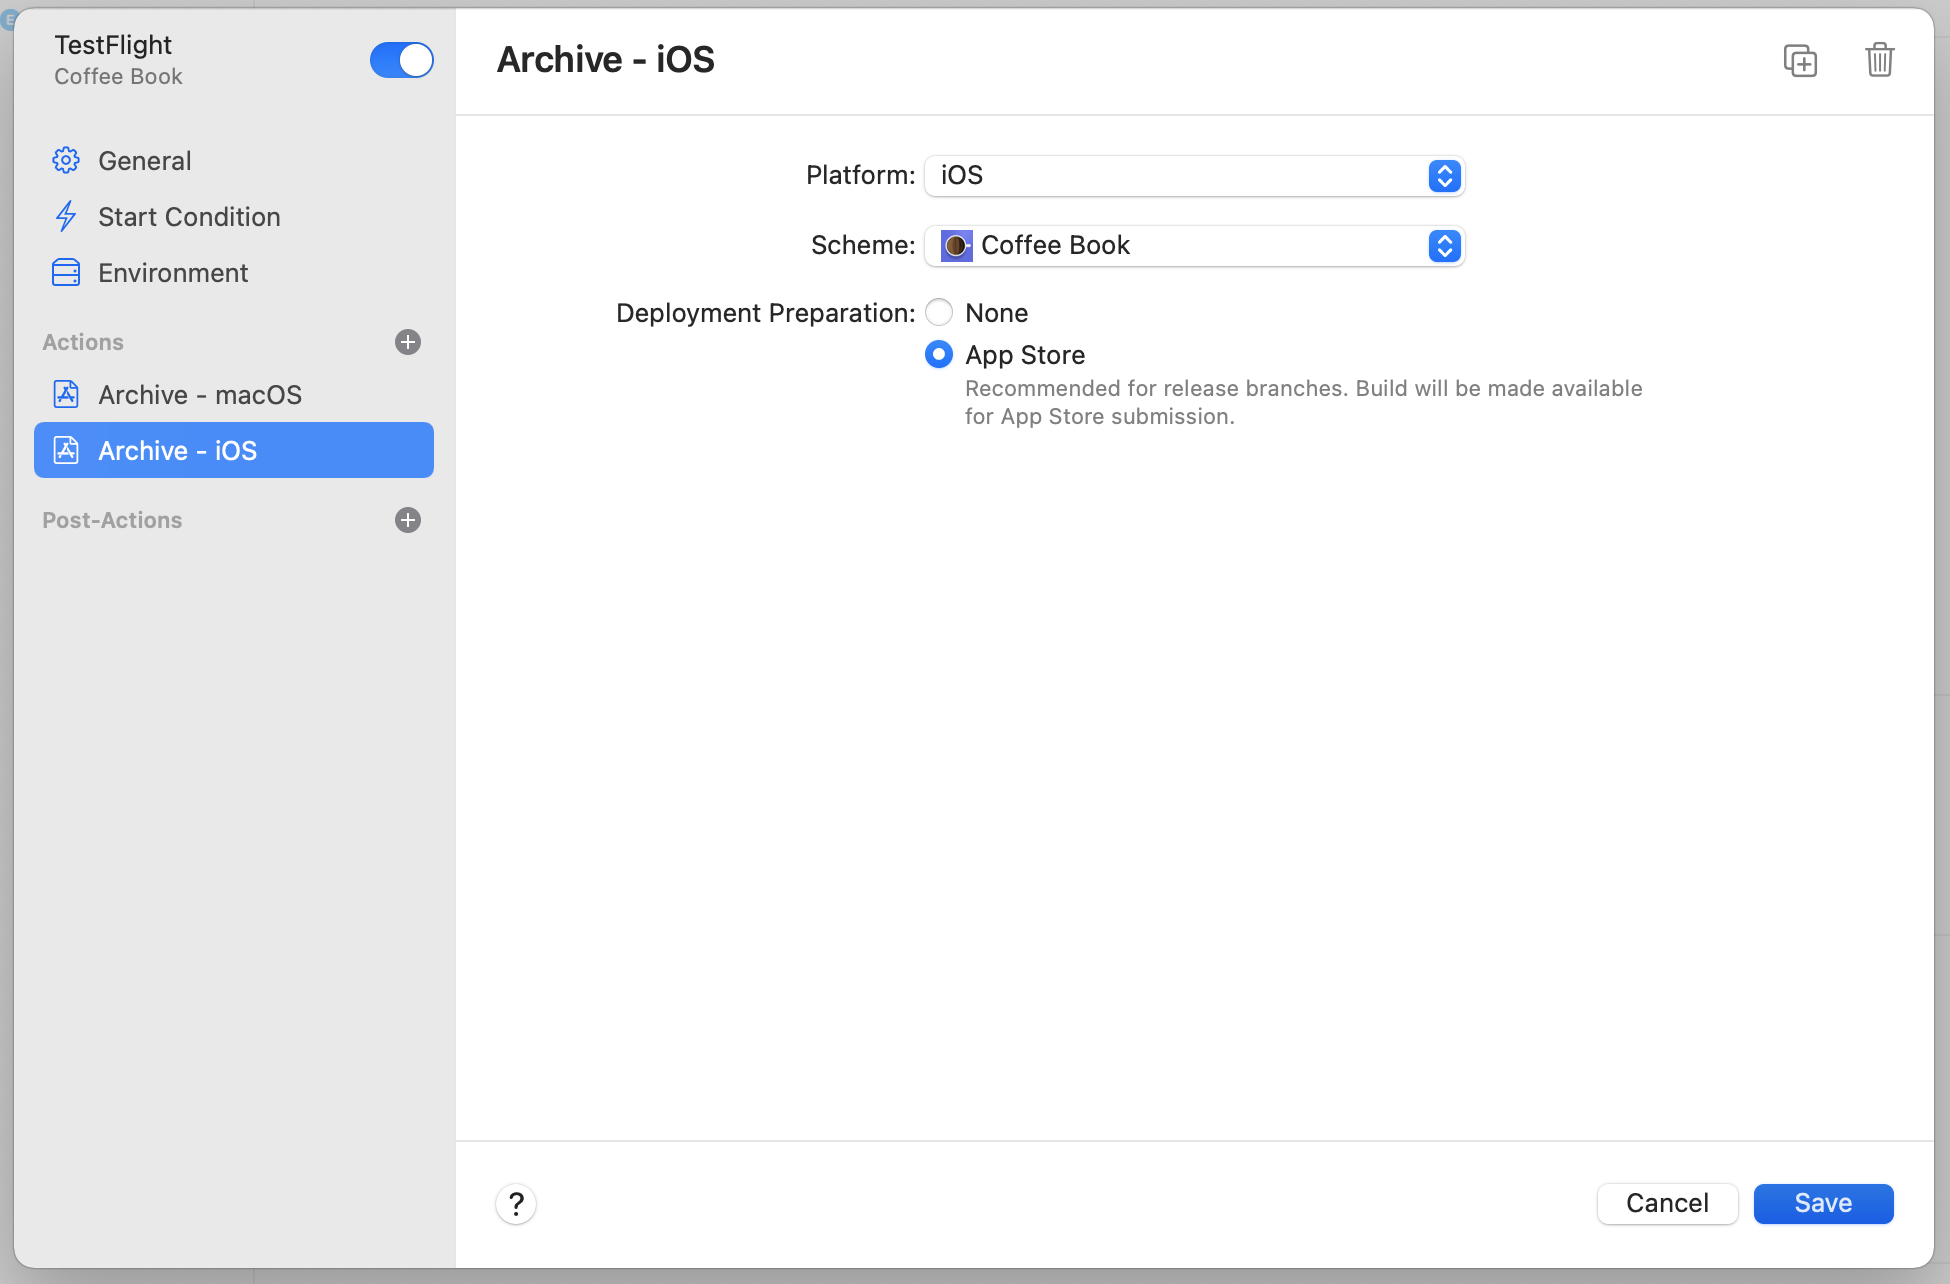
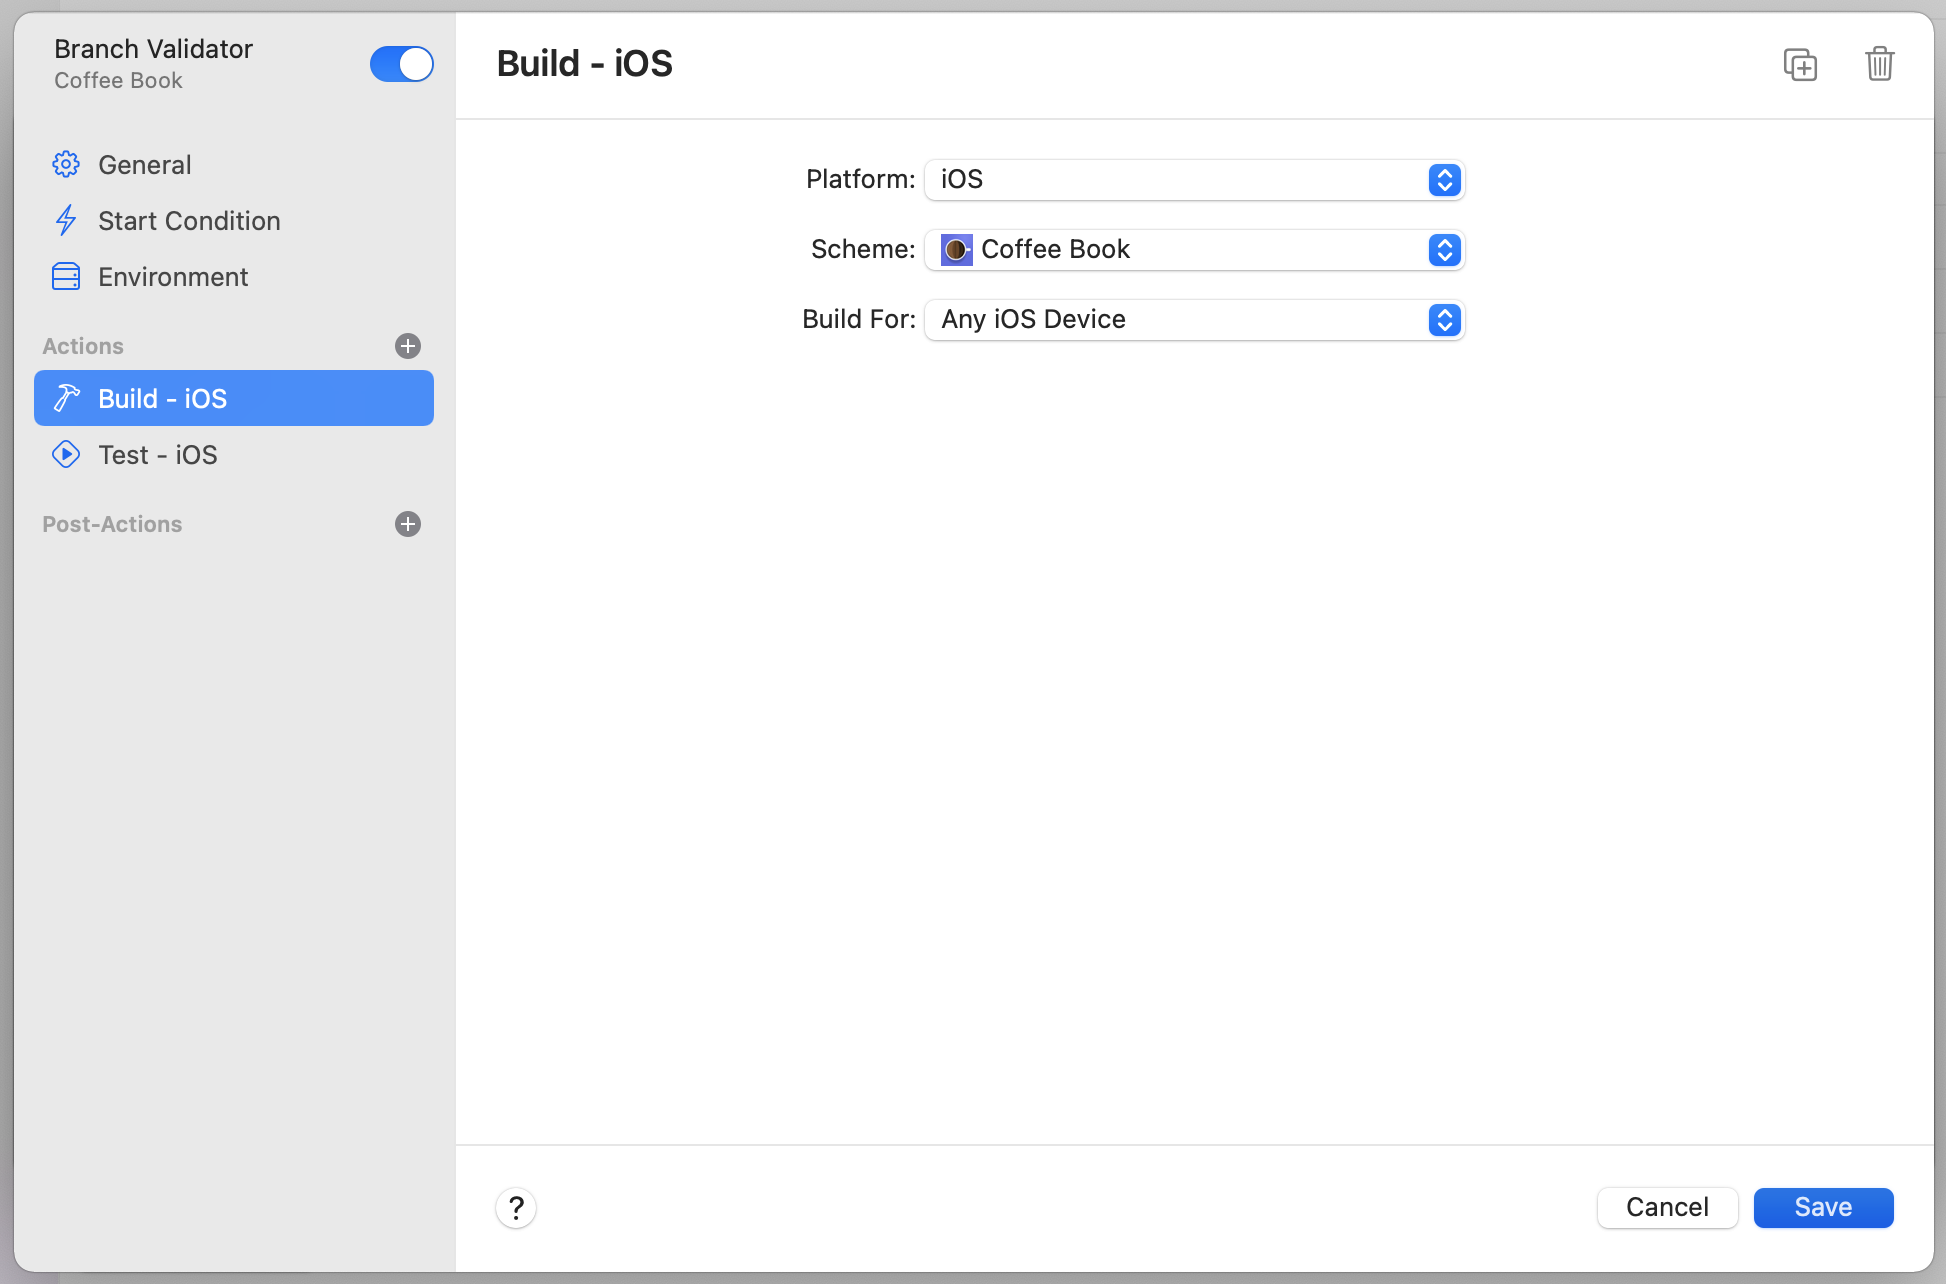
The last step is to select our Archive and configure it to build for the App Store. I don't have a custom scheme for this app, so i'll just leave it as the default, but I will set the deployment prepration to the App Store. If you don't want to archive the macOS app, simply remove it by selecting it from the list, and tapping on the trash-can in the top right.
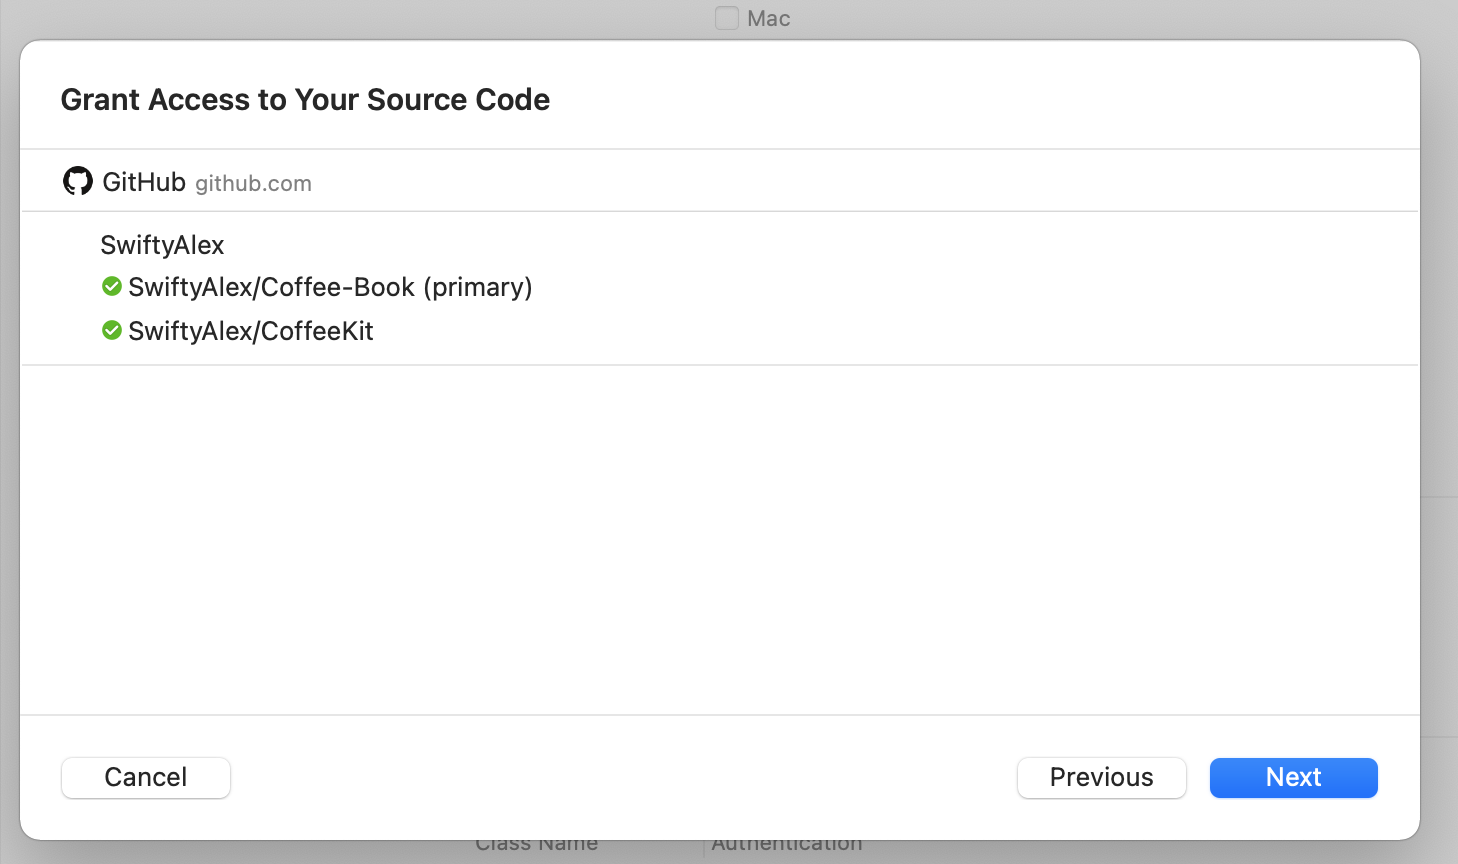
To push the build to TestFlight, we have to add a post action. A current limitation of the workflow editor is that you cannot add a TestFlight post action during initial creation, so we'll have to re-visit this later. Tap save and you'll then be asked to grant access to your source code. For me, this is all hosted on Github, so the process was pretty simple. You'll be prompted to install an app to your GitHub account, and authorise its access to your code.
When you get back to Xcode, you should see some nice green ticks to let you know you did it properly. In my case, I even have an attatched Swift Package, that I now gave Xcode access to. Its possible that when you come to building later on you could see a "repository access error", in which case you'll be prompted to grant access again to the relevant repo.
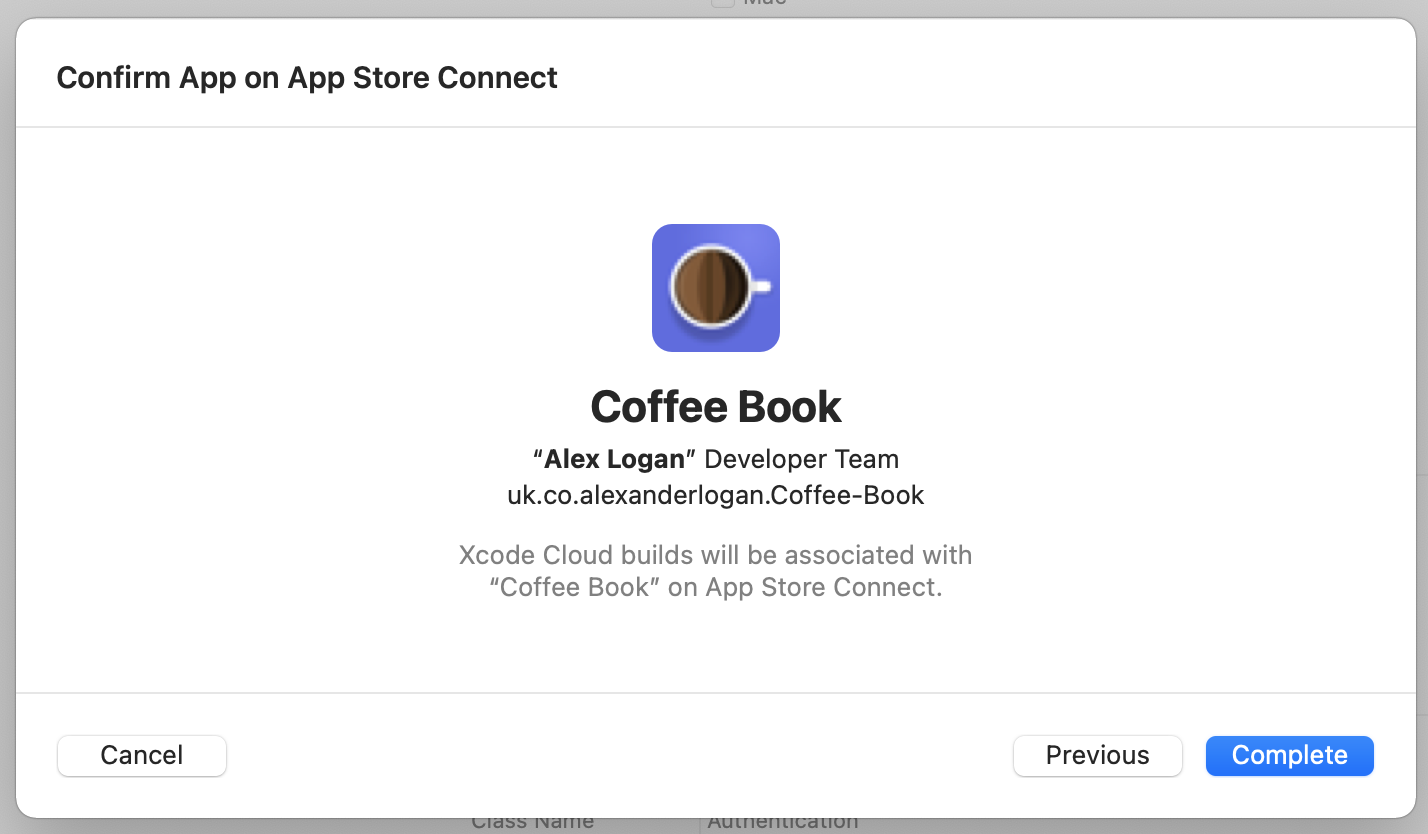
Tap next one more time, and you'll be asked to confirm that Xcode has the correct app on App Store Connect.
We now have a functioning worflow that builds our app! Xcode will ask you to start a build to test it, so select the correct branch and click start build. This first build should pass pretty quickly, then you can get right back to editing!
It still isn't quite ready though - we need to nip back into the editor and setup deployments.
To do this, select the workflow on the left hand navigator, right click and tap edit workflow. You'll recoginse this editor from our initial setup earlier.
Tap post actions, then the plus, then external beta testing. Depending on what branch this is, you might be using internal, so be sure to choose the one you actually want to go with.
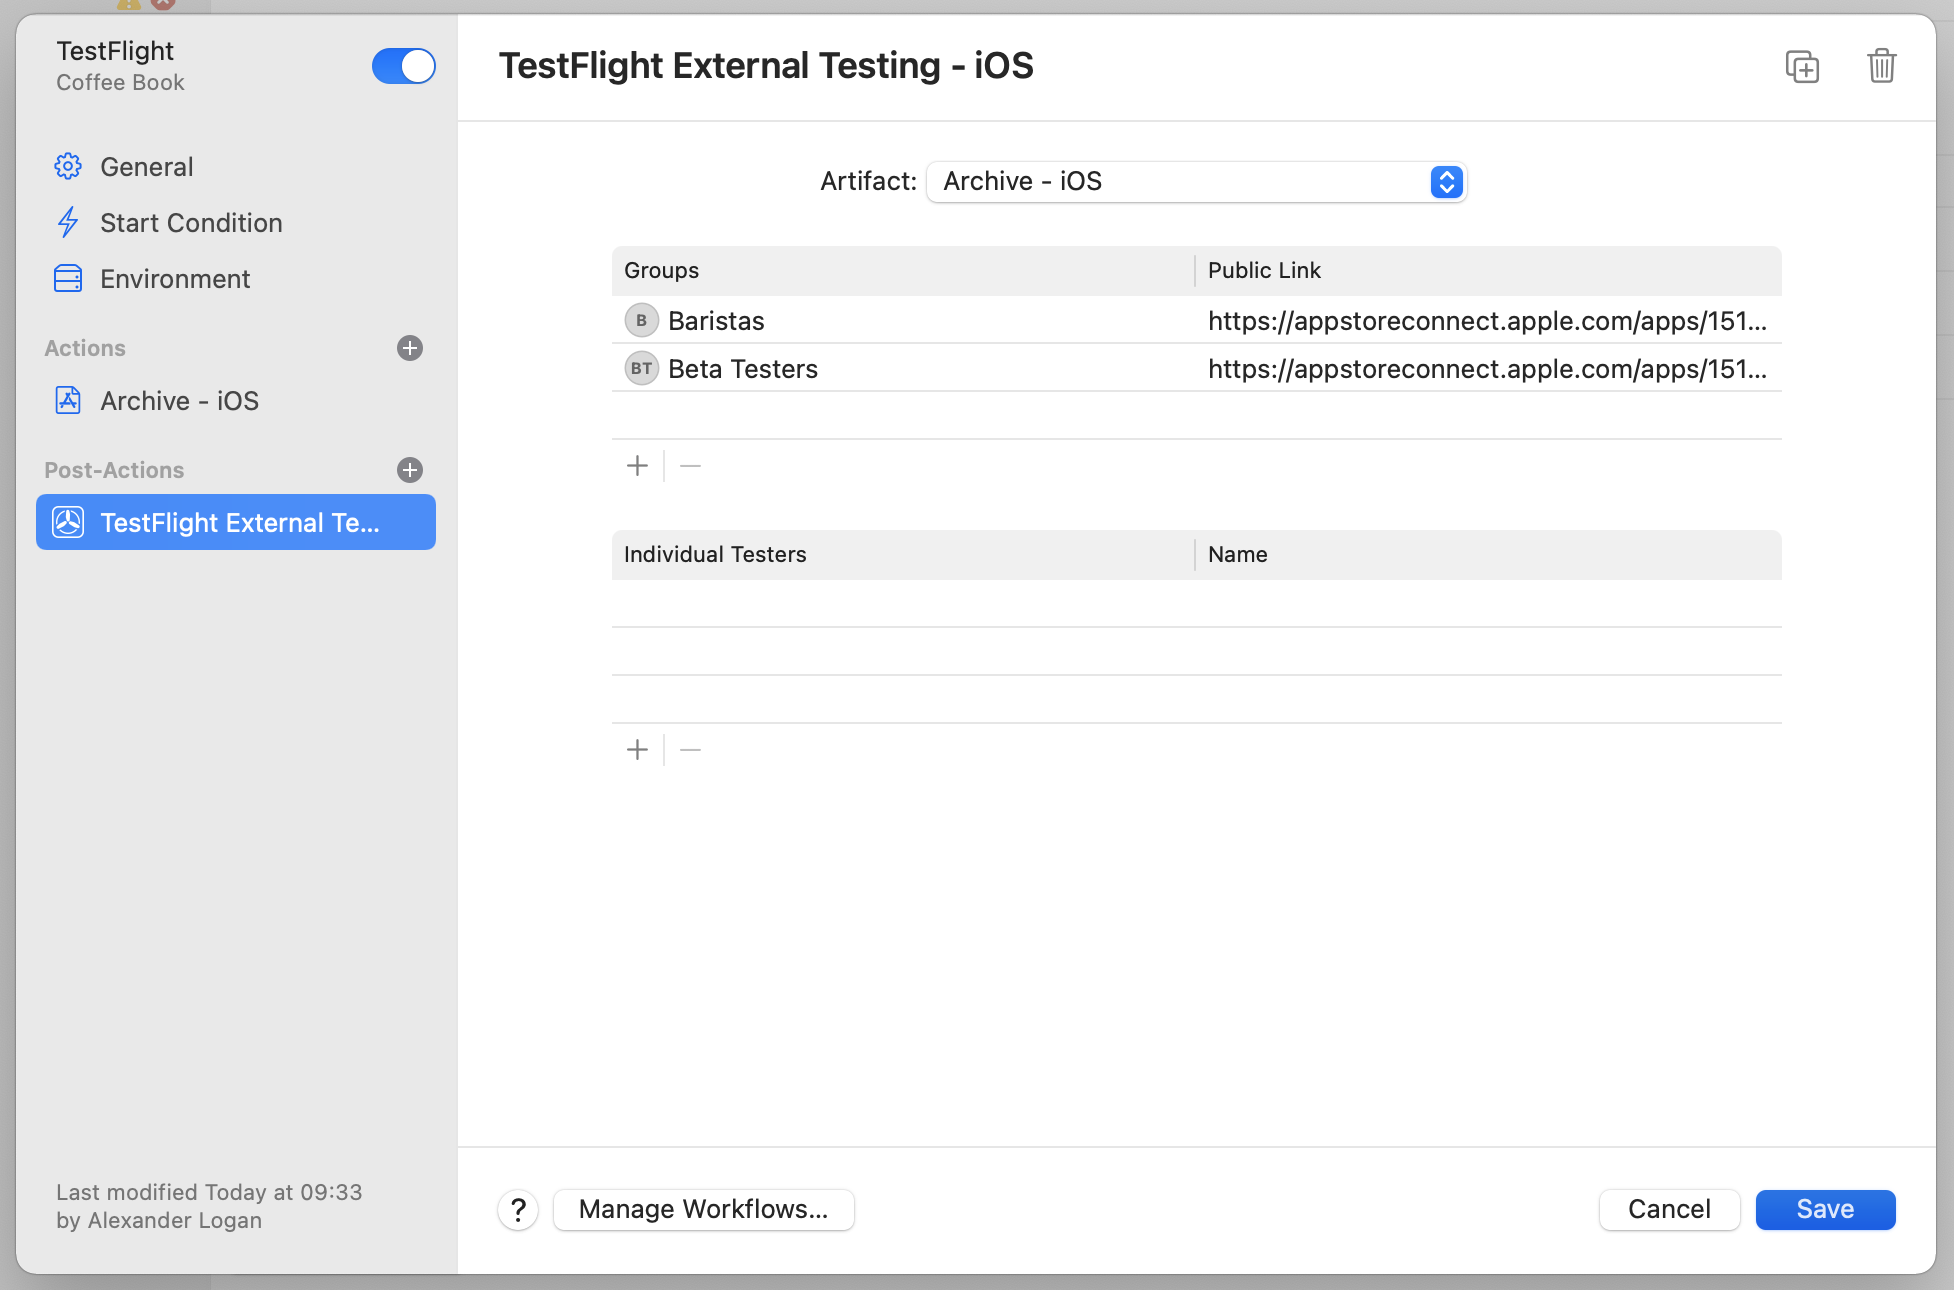
From the editor, you can now select who gets to test the app. In my case, I want to add some groups I setup a while back. When you tap the plus you'll see your existing groups. As far as I can tell, you can't create a new one here, so they'll have to pre-exist on App Store Connect.
I highly reccomend using groups to segment your audience - think beta channel for testers and developers, then release candidate only channel for management.
When you select save you'll be prompted to enable restricted editing - this is to protect your app and help you manage access to a workflow that can push to everyone.
As soon as you save - you're done! Xcode Cloud will now push testflight builds whenever theres a push to this branch.
If you'd like to add a second workflow for general branch validation, the next section will walk through that a little faster.
Just a note - if your build fails due to an encryption declaration, you'll need to add this to your plist. Add the key "ITSAppUsesNonExemptEncryption" and set the correct value, which in my case is no.
Building apps for PR Validation
A common workflow i've come across is that pushes to each pull request should trigger a build. We can set that up quite easily within Xcode Cloud, so lets get right to it. This one won't be deploying to TestFlight - we're using it to get a little green tick to tell us how it went.
Right click our app again and this time select manage workflows instead of edit. If you tap the plus on the bottom and select your product, you'll find yourself right back in the workflow editor.
The default settings for the editor are just about what we want - we just have to chose how often to build. In the start condition editor, I've set it to run for every change to a PR, for any branch, with any destination. This is potentially quite a lot of builds, but its great for peace of mind.
Our first action we'll need to setup is a generic build. Tap the plus next to actions and select build from the list. I didn't have to change anything here, so I moved onto the next step. If you'd like this to run a specific scheme, you can set all that up here.
The only extra bit of work to do is make sure our tests get run. Tap the plus next to actions and select test from the list this time. For these builds they shoudl be required to pass, and its great to run them on the reccomended iPhones. If you have an iPad app, I'd reccomend running on those too.
Tap save and your workflow is complete. To test it, open a PR on your source control provider and watch Xcode spool up a build.
Your build will even have nice failure messages, such as when your code conflicts with the destination.
So thats it - a fully functioning workflow in a very short space of time. I'll be evaluating Xcode cloud over the coming months to see how it fits with the workflow for Coffee Book, comparing with third-party providers such as Bitrise.
If you fancy reading a little more, or sharing your experiences, I’m @SwiftyAlex on twitter.
